If you’ve owned a Cricut Explore Air 2 or the Cricut Maker for even just a little while, you’re probably beginning to realize how truly versatile this machine really is. You will be wowed at the projects you can make using your Cricut and Design Space: from home décor to DIY note cards, from personalized t-shirts and clothing for gifts, there’s really nothing that can’t be done with the Cricut. And it’s just so easy to use! Want to see what all the Cricut can cut?
But what about Design Space? At first glance, Design Space can have a huge learning curve. You might be thinking that using Design Space is a little beyond what you’re capable of in these beginning stages of learning to use die-cut machines, right? Wrong!
Cricut Design Space is incredibly user-friendly and very straightforward: although it has some amazing, features that let you create a wide range of crafts, it’s not a complex program, it’s actually very easy to learn. You just need to take the time to learn it. After one or two projects you will almost be a pro after reading through this guide!
This post is LONG you guys! Use the table of contents to jump to section quickly if you are looking for specific help.
How To Use Cricut Design Space
Before we dive in, you should know that Cricut Design Space comes with tons of free stuff such as projects, images, and fonts! But I highly recommend you purchase Cricut Access. This just gives you more options to use and it’s relatively cheap to have access to everything!
How To Install Cricut Design Space
To install Cricut Design Space simply follow these instructions.
- Go to design.cricut.com.
- Choose download.
- Open the file on your computer by double-clicking it.
- After it is installed, it will redirect you to the login screen. You can log in now or create your user name and password.
- After you log in the first time, it will remember you so you won’t have to do this in the future.
For more detailed instructions or troubleshooting visit the Cricut website.
Starting a New Project with Design Space:
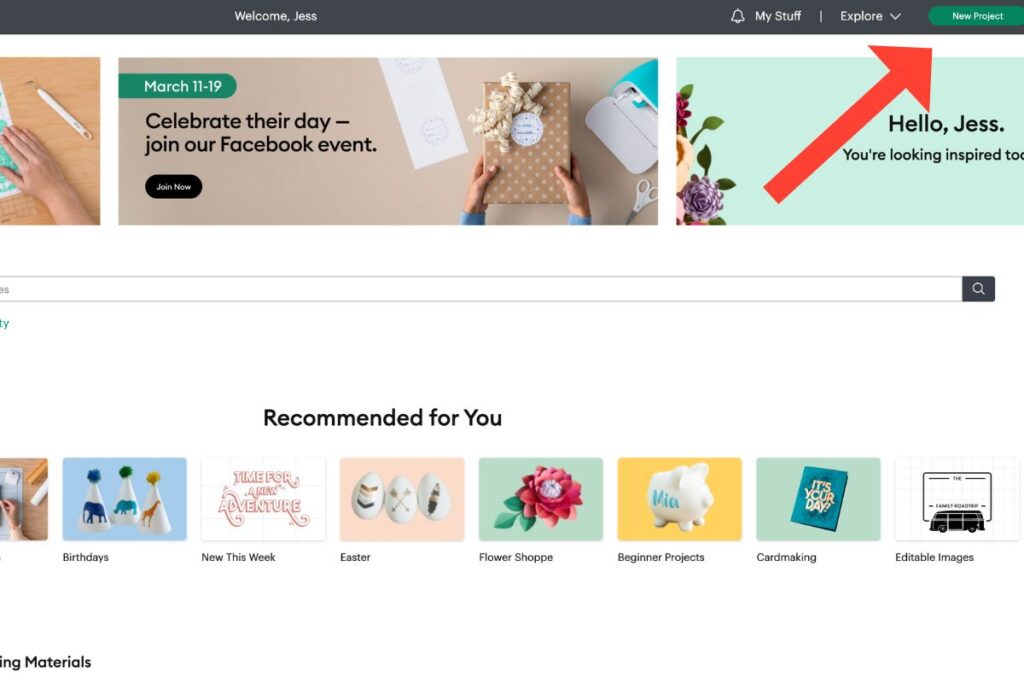
We’ll start with a brand new project to get you going. Begin by opening up Cricut Design Space. Your screen should look like the one below.
Start a new project by selecting “New Project” at the top right-hand corner. You can also browse through any number of the “Ready to Make” projects on this page, look through their files, and see Cricut tutorials.
These are really fun and easy to use, so if you’re running short on time or are just not in the mood to be particularly picky, a ready-made project could be just the thing for you.
Menu Options
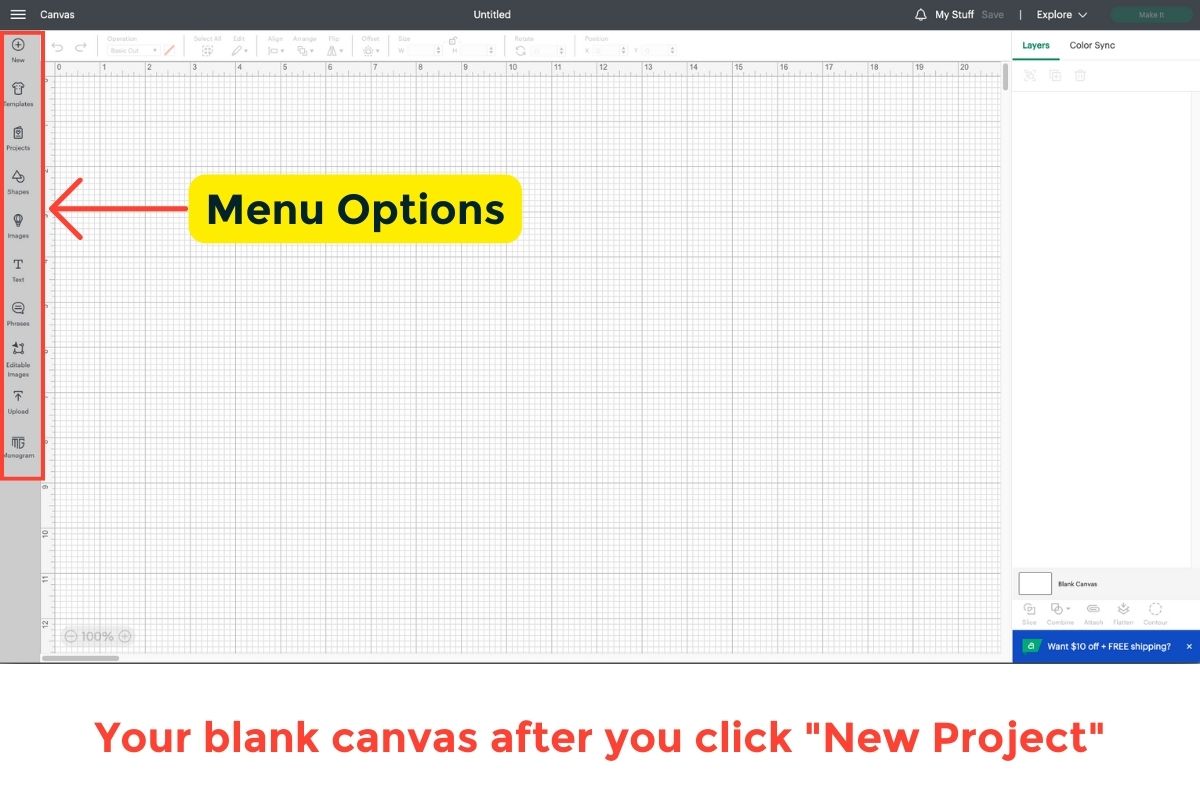
This is your primary workspace, so you’ll want to get to know it well. On the left-hand side of your canvas you’ll see seven different menu options, which are:
- New
- Templates
- Projects
- Shapes
- Images
- Text
- Phrases
- Editable Images
- Upload
- Monogram
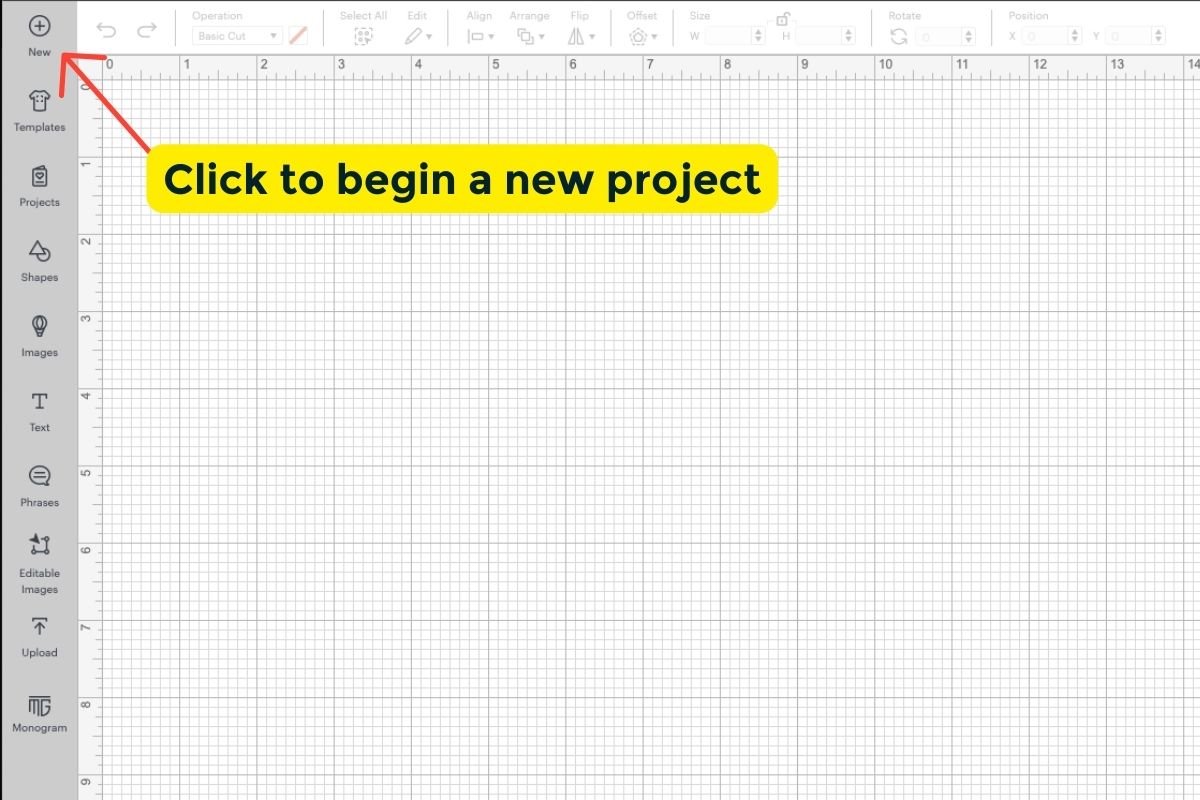
New
Click this button any time you’d like to begin a new project with a brand new blank canvas. If you click the button and have already started working on a project, you’ll be prompted to either save or replace your current work.
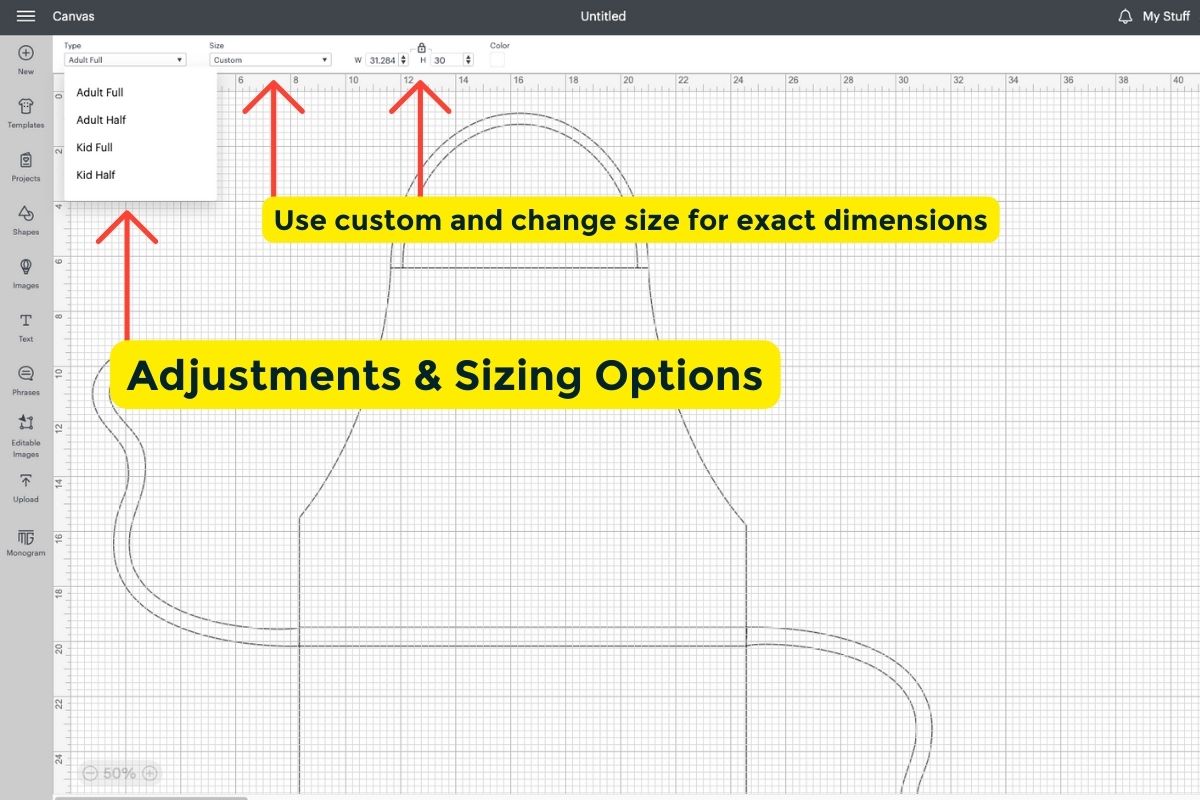
Templates
The “templates” button allows you to select templates that will better help you visualize what your design will look like on a given item or backdrop (example: if you’re putting together a design to go on a t-shirt, you can choose a t-shirt template to help you visualize the size and shape of your design on that t-shirt). It is important to note that the template you choose is NOT a cut-out: it’s just a guide to help with visualization.
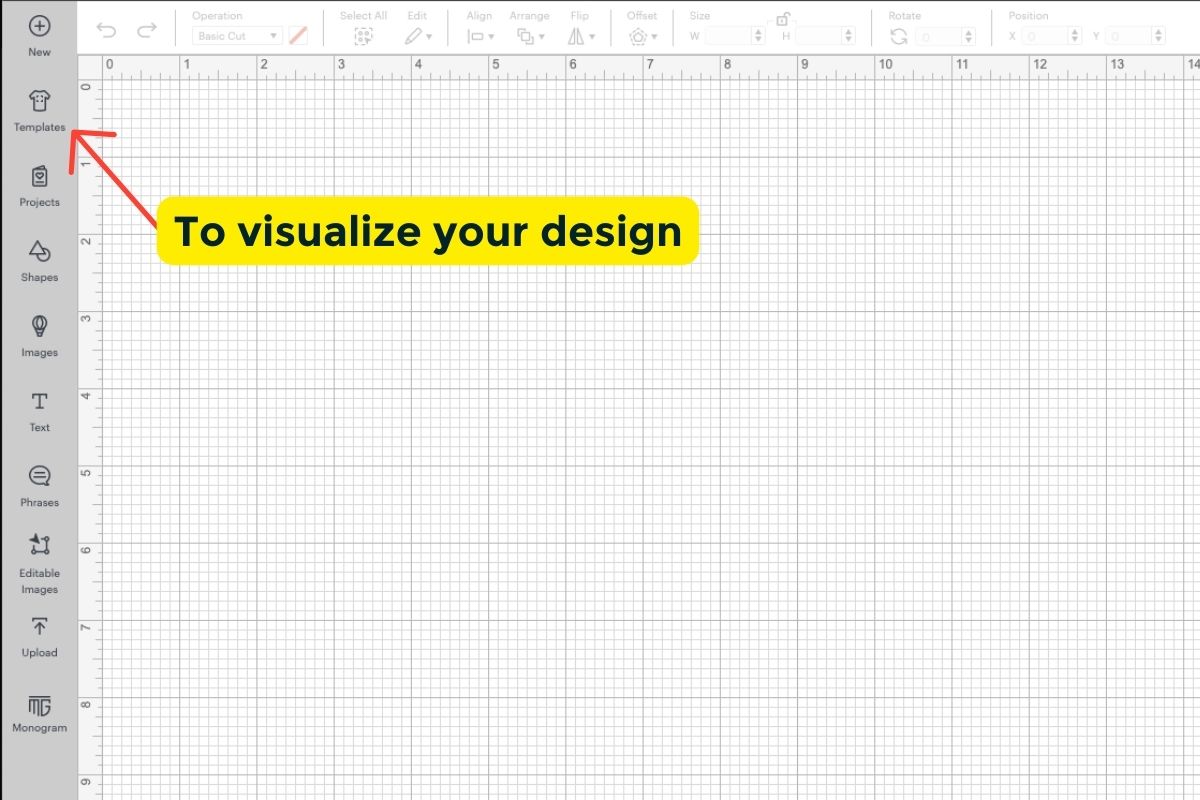

Templates allow you to adjust sizing: if you want to put a design on a kid’s t-shirt rather than adults (for example), a drop-down menu will allow you to make that specification.
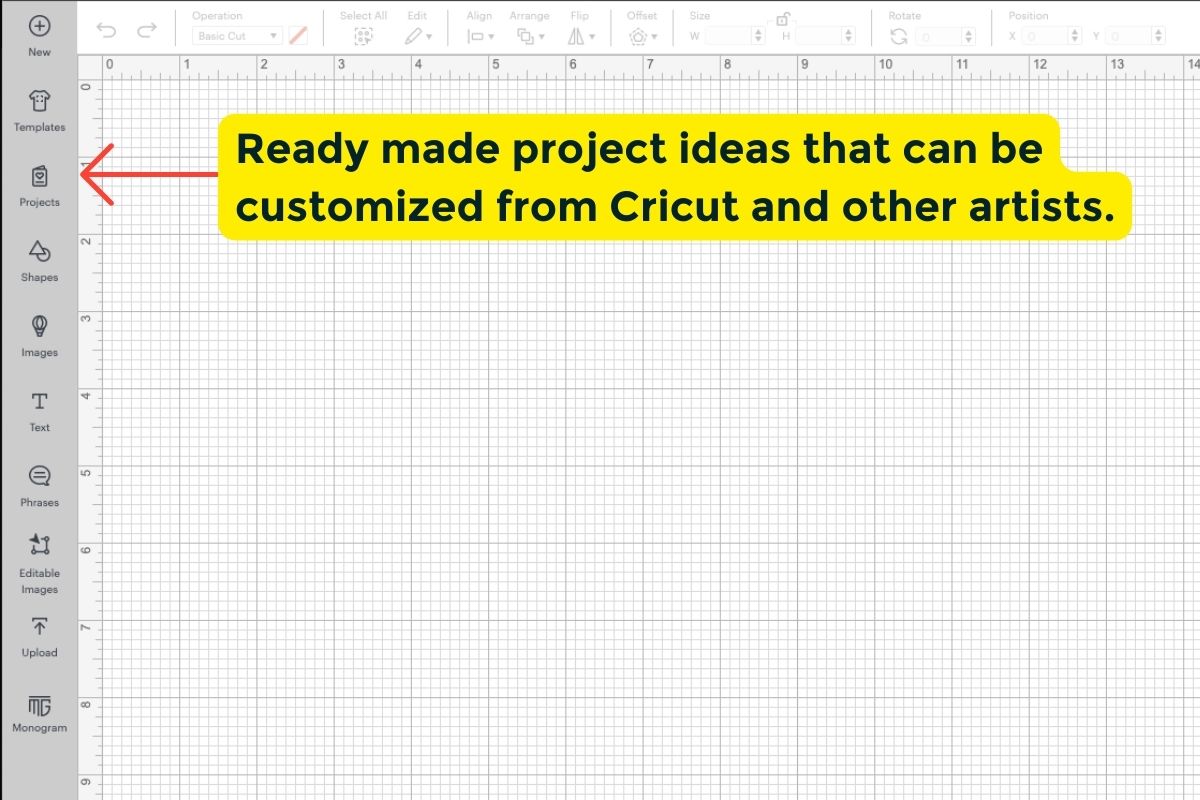
Projects:
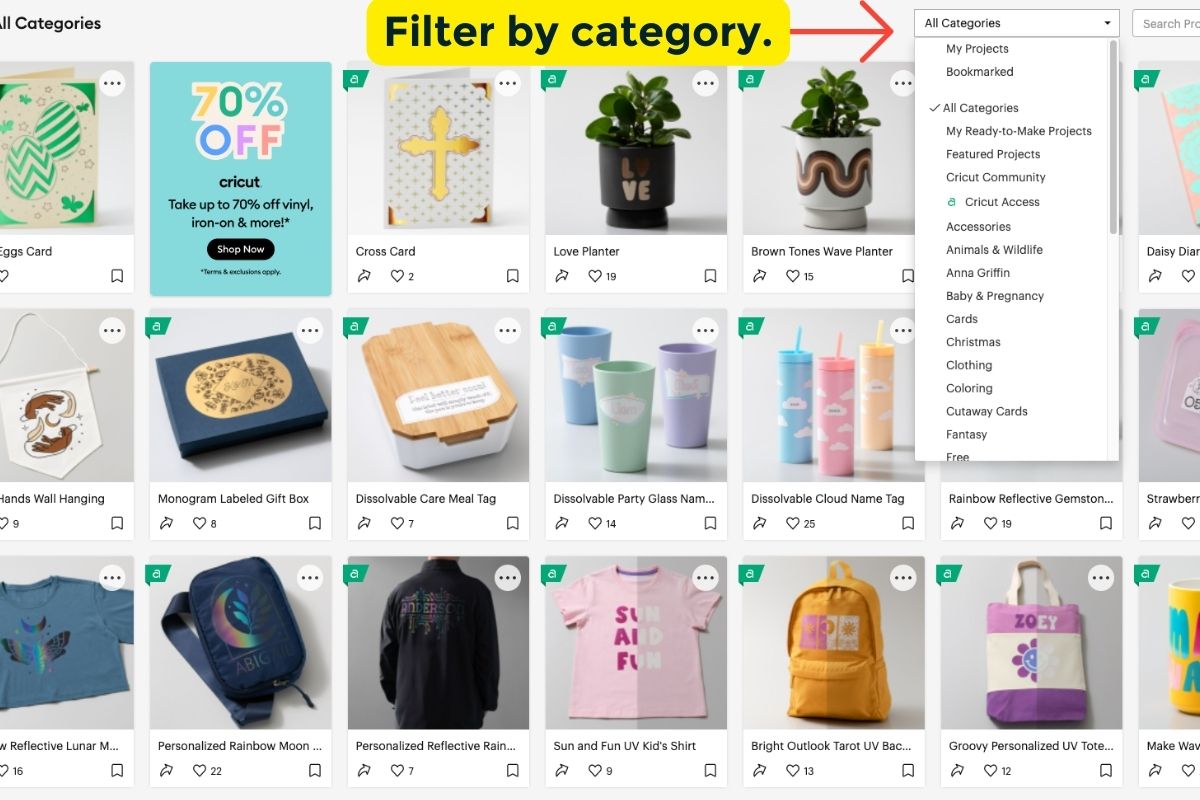
If you’re just getting your feet wet and want a little help using Design Space, clicking “Projects” allows you to see all of the Ready-Made Project options that are available to you. Many require no editing at all but a few allow for customization: this is a good way to practice your Design Space skills. them.
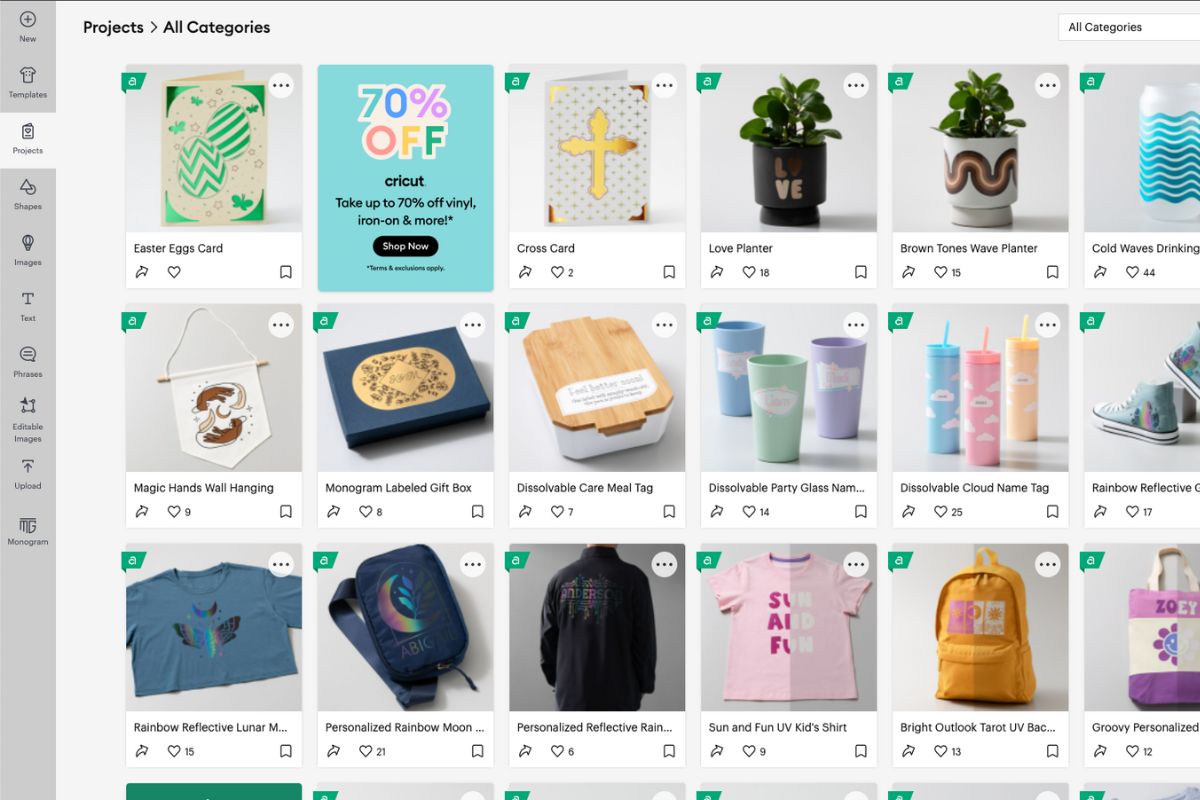
You can also use the drop-down menu to search for specific ready-made projects included with Cricut Access. Categories like “Free for Cricut Explore” or “Free for Cricut Maker” are available to use at no cost, and are great for helping you get a feel for using your Cricut.
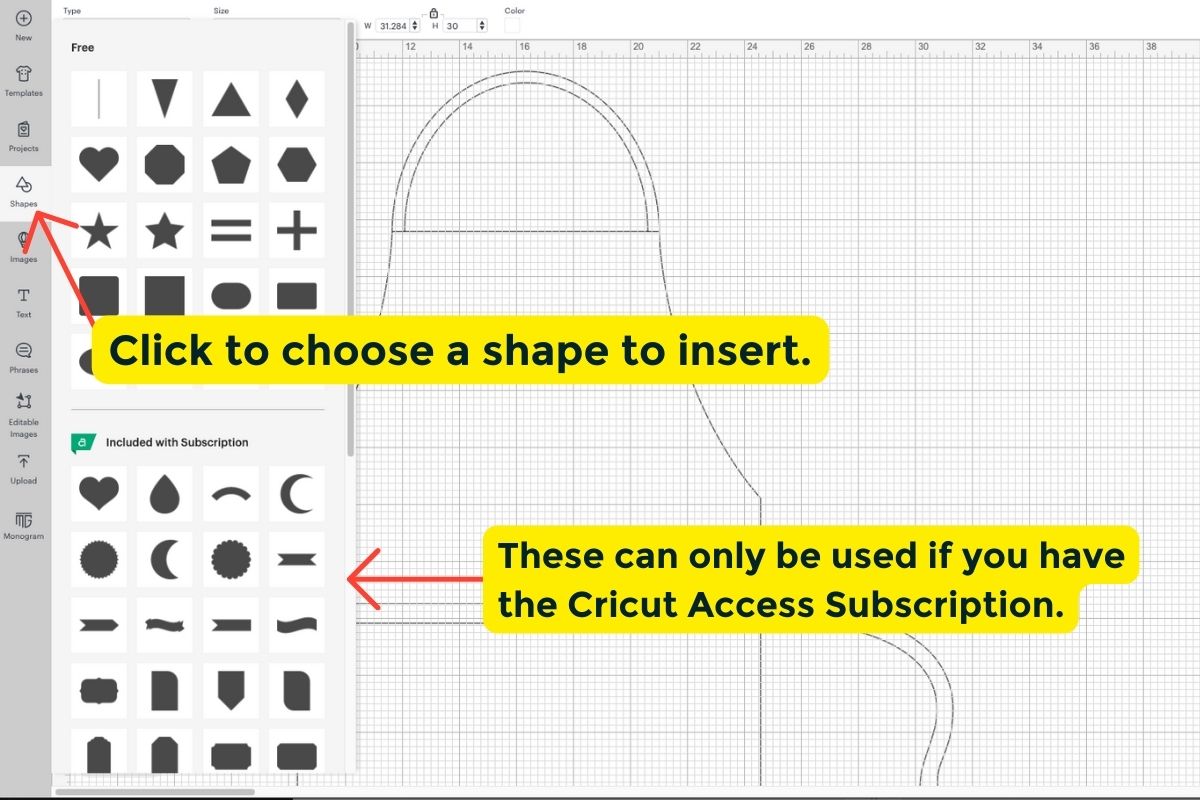
Shapes
The shapes menu offers simple shapes that can be used in designs or you can use them as templates to replicate wood blocks, etc.
The top section are the free shapes, while the bottom ones require a subscription to Cricut Access.
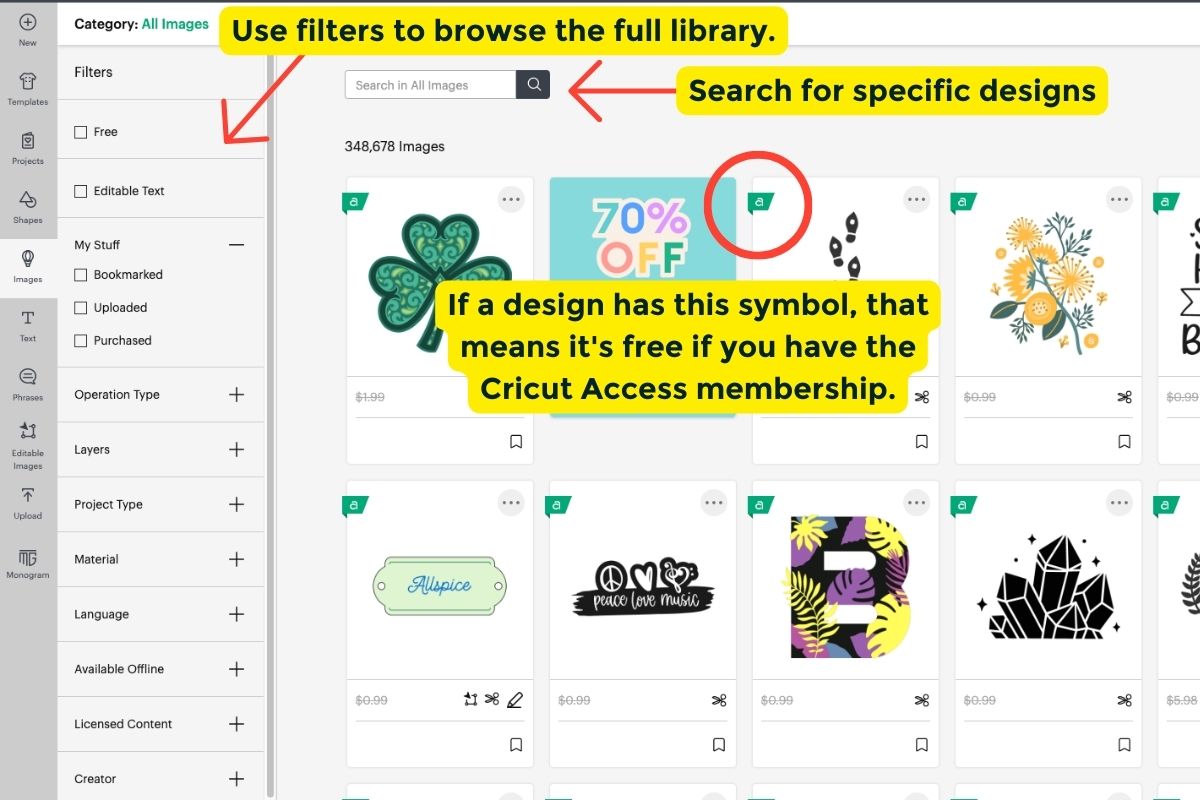
Images
Click on the “Images” button to access the Design Space library of pre-made images. Over one thousand images are available to you here with the click of a button, all of which can be easily inserted into your new project or design.
A search option towards the top right-hand side will help you narrow down your search when looking for specific designs (you can search for specific images like “bird” or “apple,” or whatever!). A green “A” in the top left-hand corner of an image indicates that it is available for free via Cricut Access.

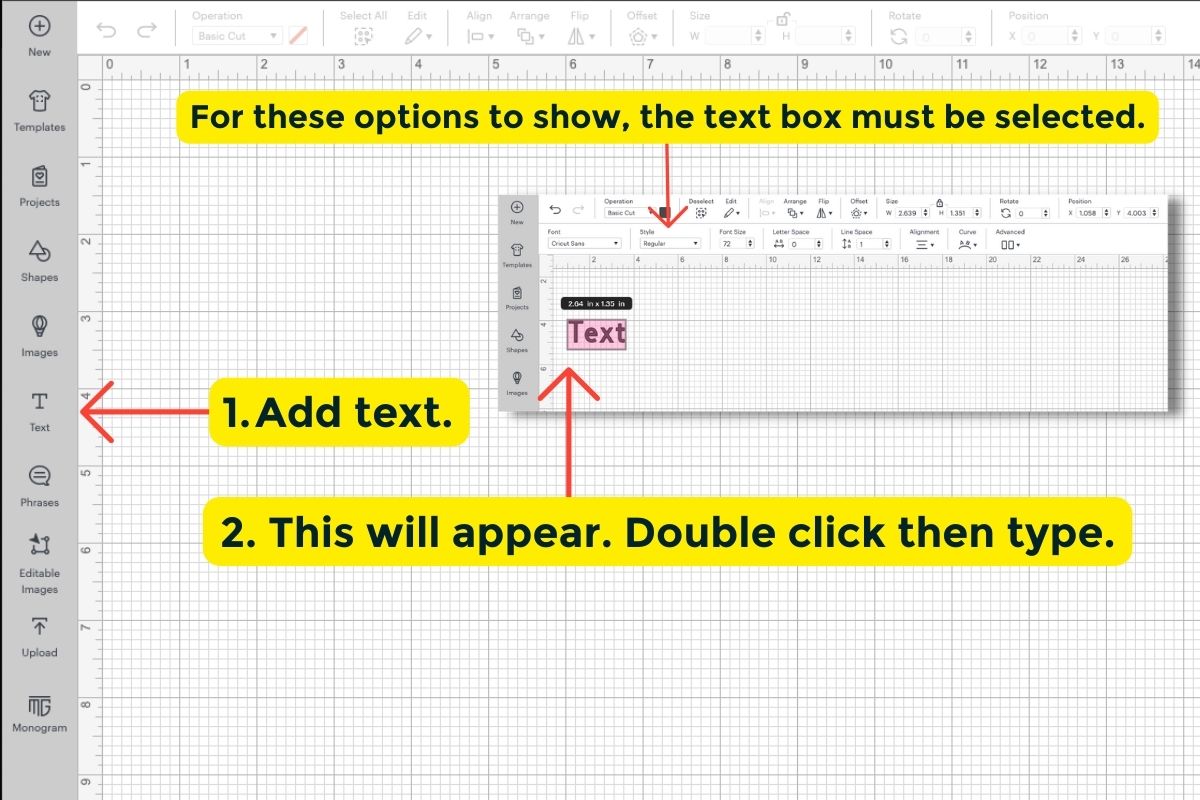
Text
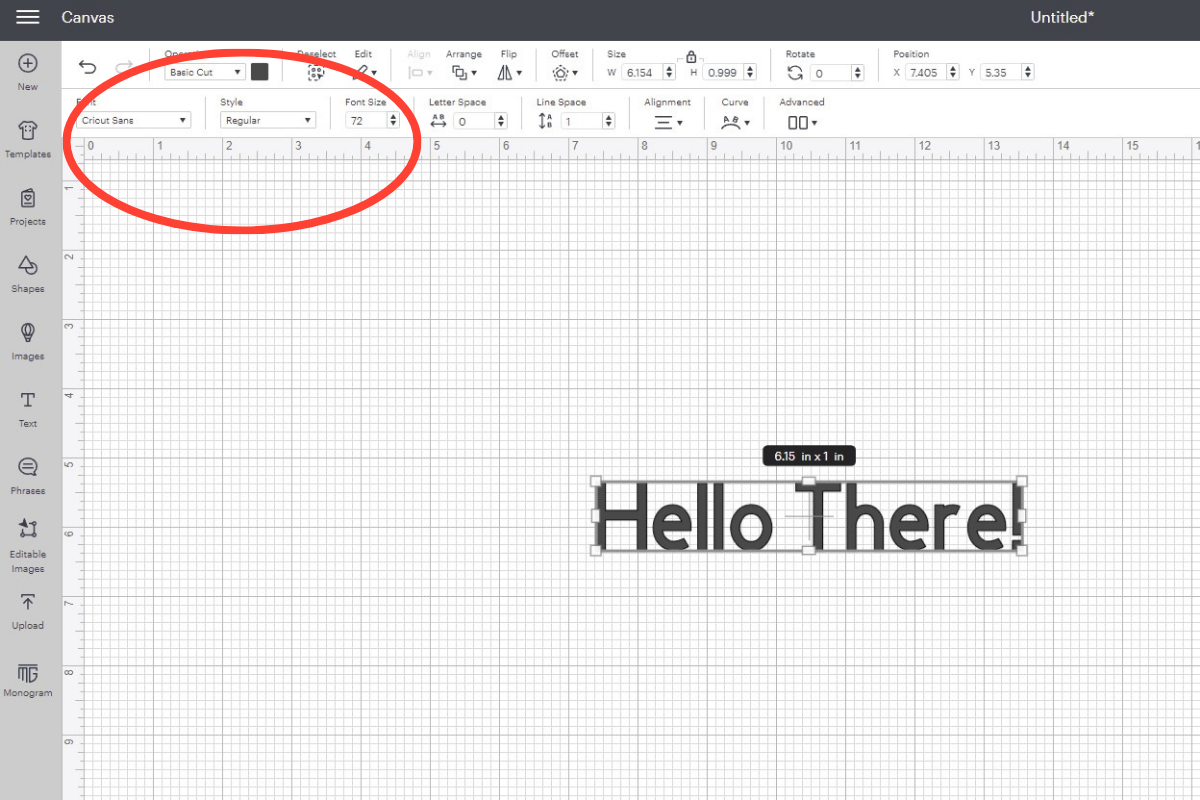
When you click “Text,” a text box will appear, where you can double click to start typing. A toolbar along the top of the canvas lets you edit your text (adjust font, font size, color, etc.). Make sure the text is selected to allow you to make edits.
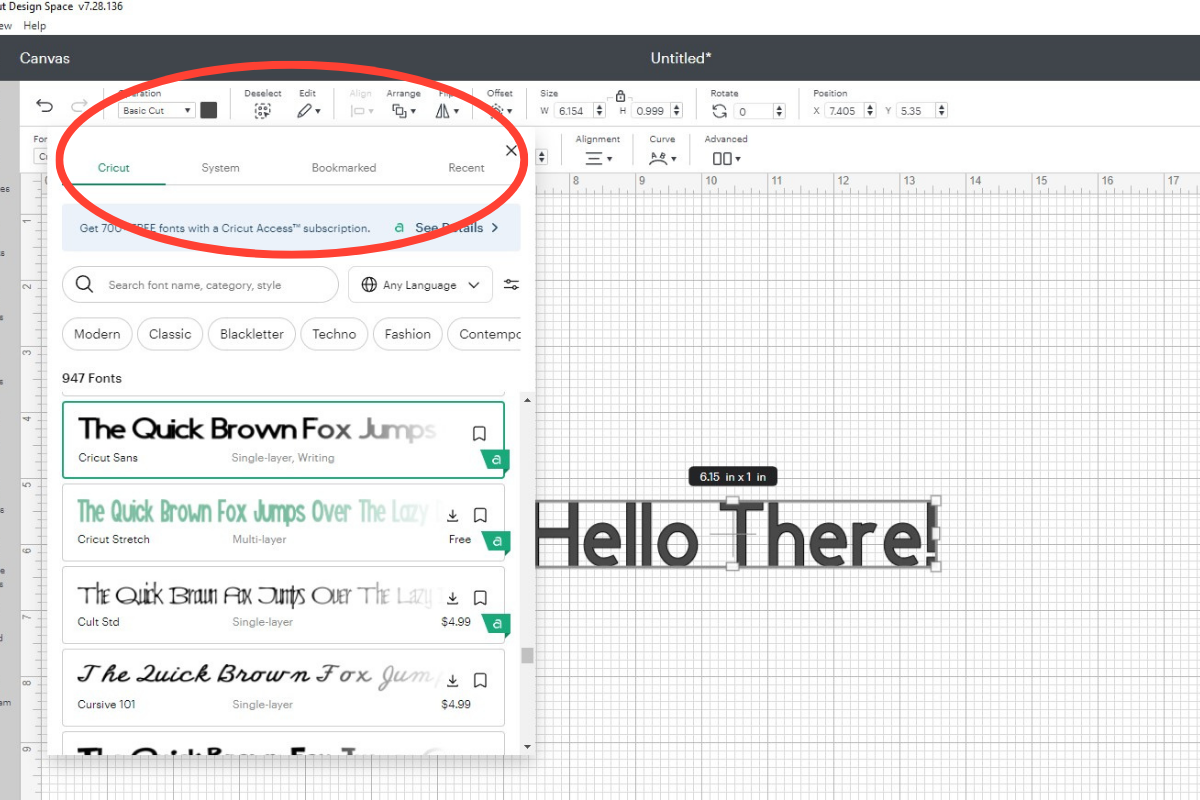
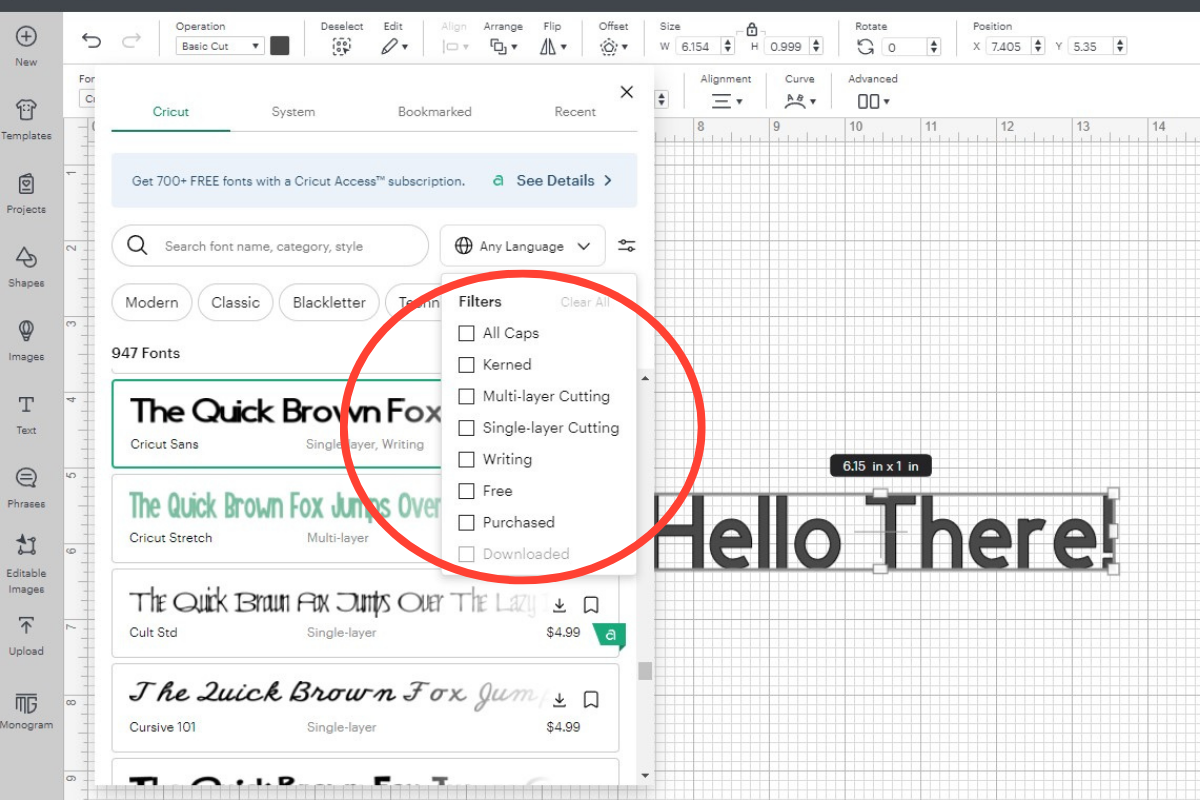
The very first drop-down in the toolbar allows you to change the font. You can either choose from the “All Fonts” category, the “System Fonts” category (these are fonts available on your particular computer), or the “Cricut Fonts” category (special fonts available only to Cricut users on Design Space!). A search bar is also available if you’d like to search for a specific font.
When searching for fonts, you have the ability to use a “filter” option, located on the far left-hand side of the toolbar. One or multiple filters selected allow you to drill down your search terms. For example, you could filter through only “My Fonts” and “Writing” to pull up relevant fonts that are best for writing (especially if you want to use special Cricut pens).
Select your text, then look to the far left-hand side. Here, you can use multi-layer fonts (those that have a shadow). An “eye” icon allows you to enable shadow with your current text. Clicking it off hides the shadow.
You can also do some neat things here: like change font style, font size, letter and line spacing, and our page alignment. They’re not unlike options you’d find if you’re used to using Microsoft Word or Microsoft Powerpoint, just located in a slightly different place. Have fun playing around to see all that’s possible with texts in this cool and easy-to-use platform.
Letter Space
Within your text editing options, there are a number of things you need to know about. First is Letter Space. This is an awesome tool if you’re using cursive fonts: you can increase or decrease the spacing between letters with simply the push or pull of an arrow. It may not seem like a big deal, but this is important: when you’re cutting out cursive style letters, you’ll need them to be touching each other to create one cohesive cut. So learn this tool well!
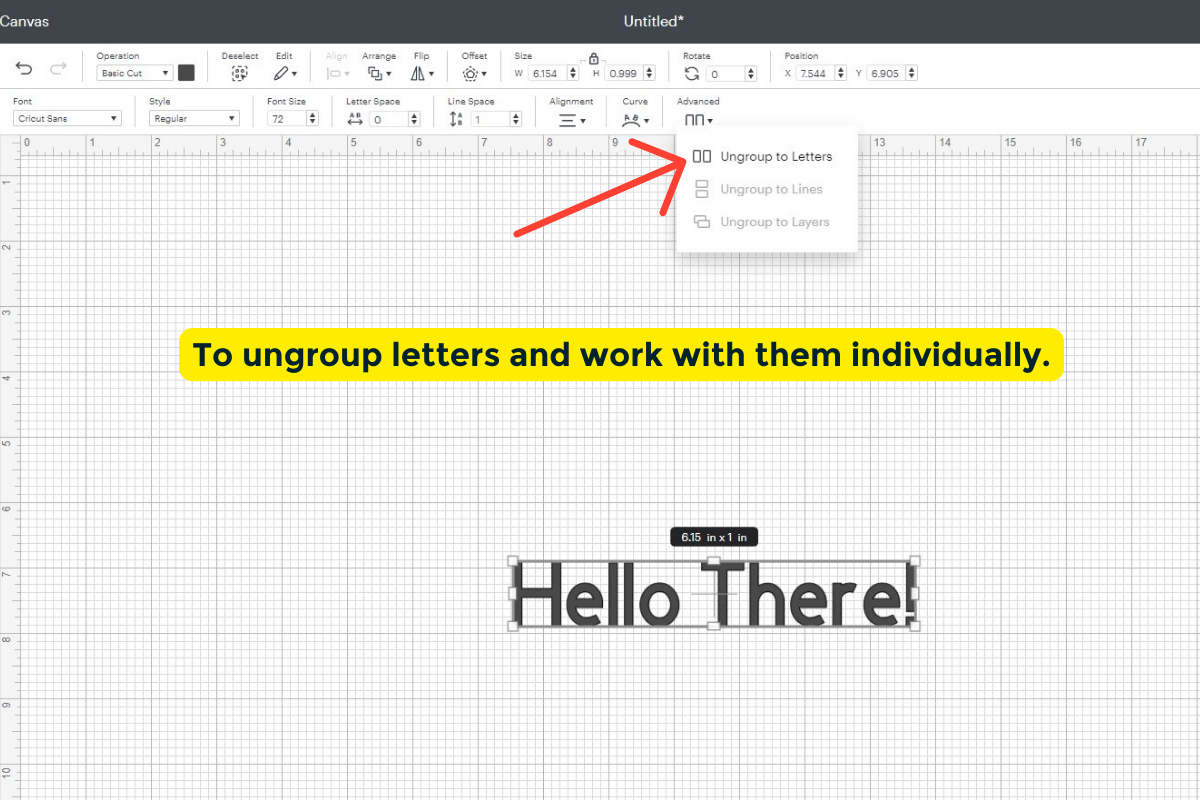
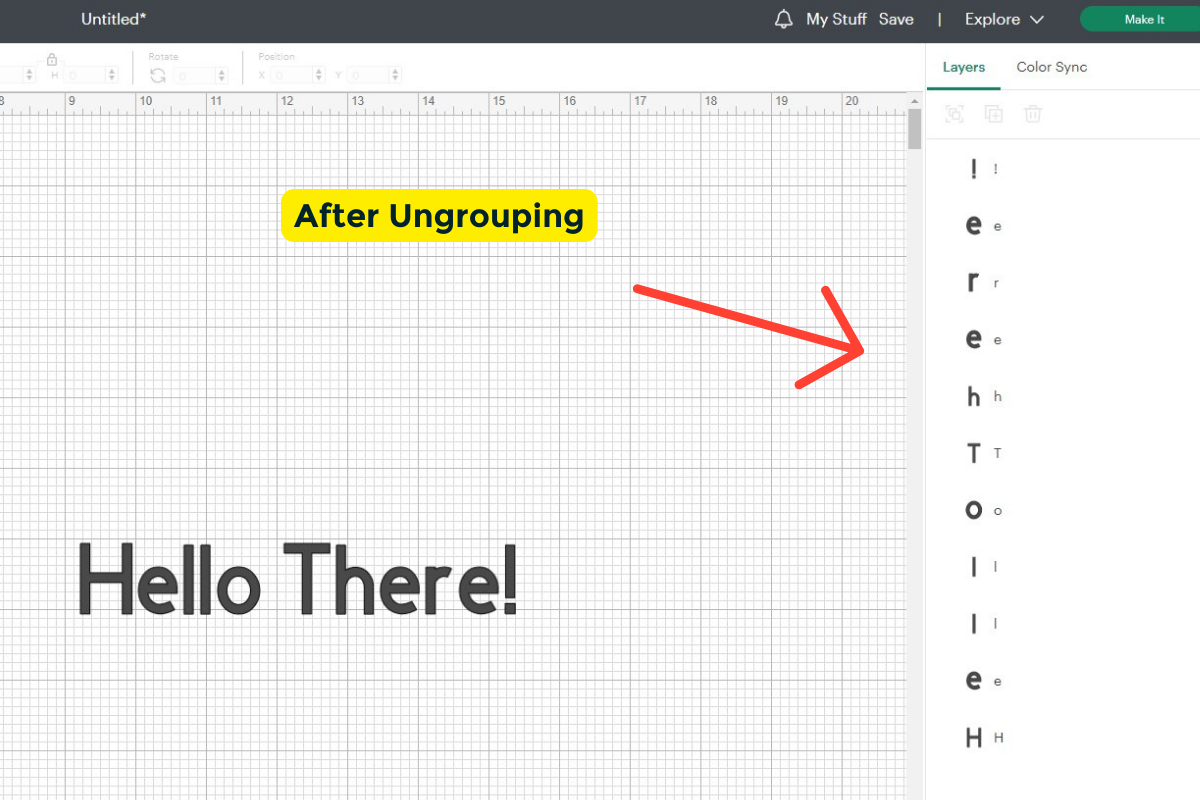
Isolation Letters
Here’s another important tool to be aware of. Isolation Letters lets you work on each letter individually. If, for example, you want one letter to be bigger than the others, or you need to rotate each letter individually so that your word can curl, this is where you’d accomplish that. Another way to “isolate” letters is to right click the text and select “ungroup”: now each of your letters will act individually. When done editing, right click and select “group” to create one cohesive text box again.
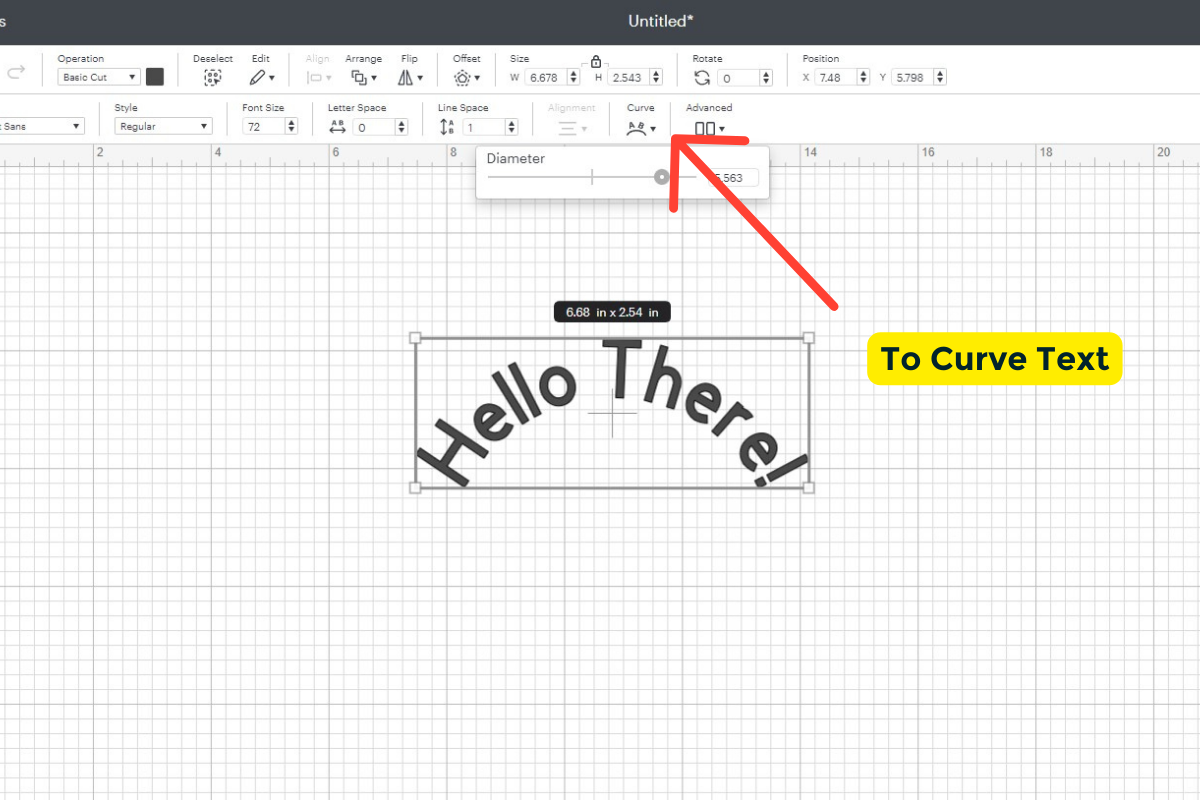
Curve Text
When they updated Design Space, they finally put a button in where you can curve the text with just a few clicks!
Phrases
This section is really just Cricut files that you can use that are considered phrases. Remember, those marked with the “A” are free with a Cricut Access subscription.
Editable Images
These are files and images from the library that can actually be edited before making a design.
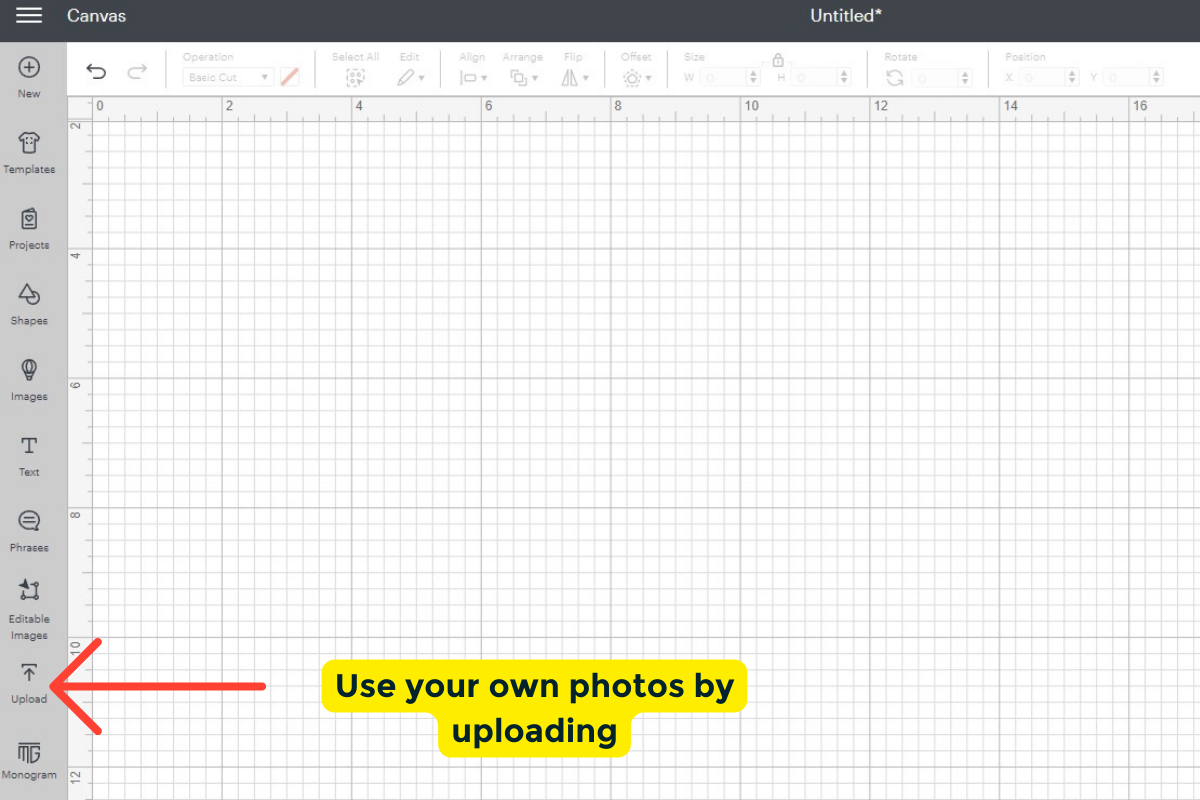
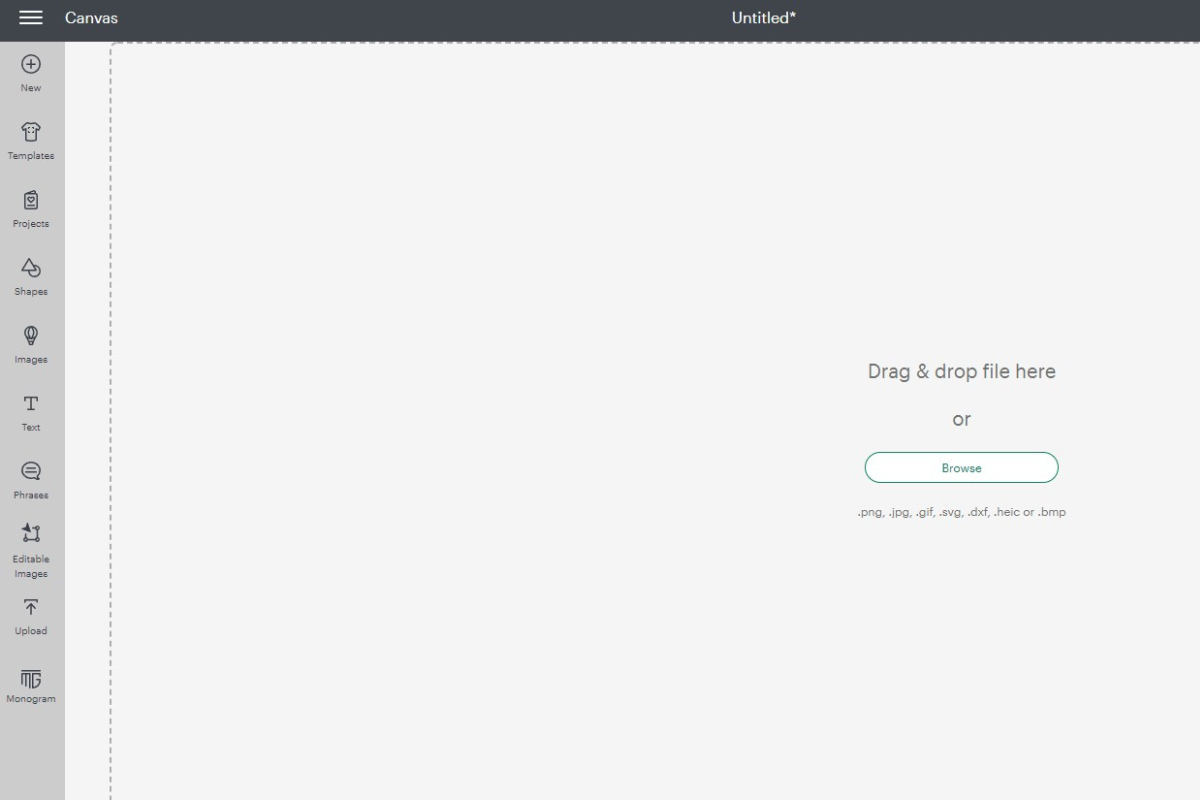
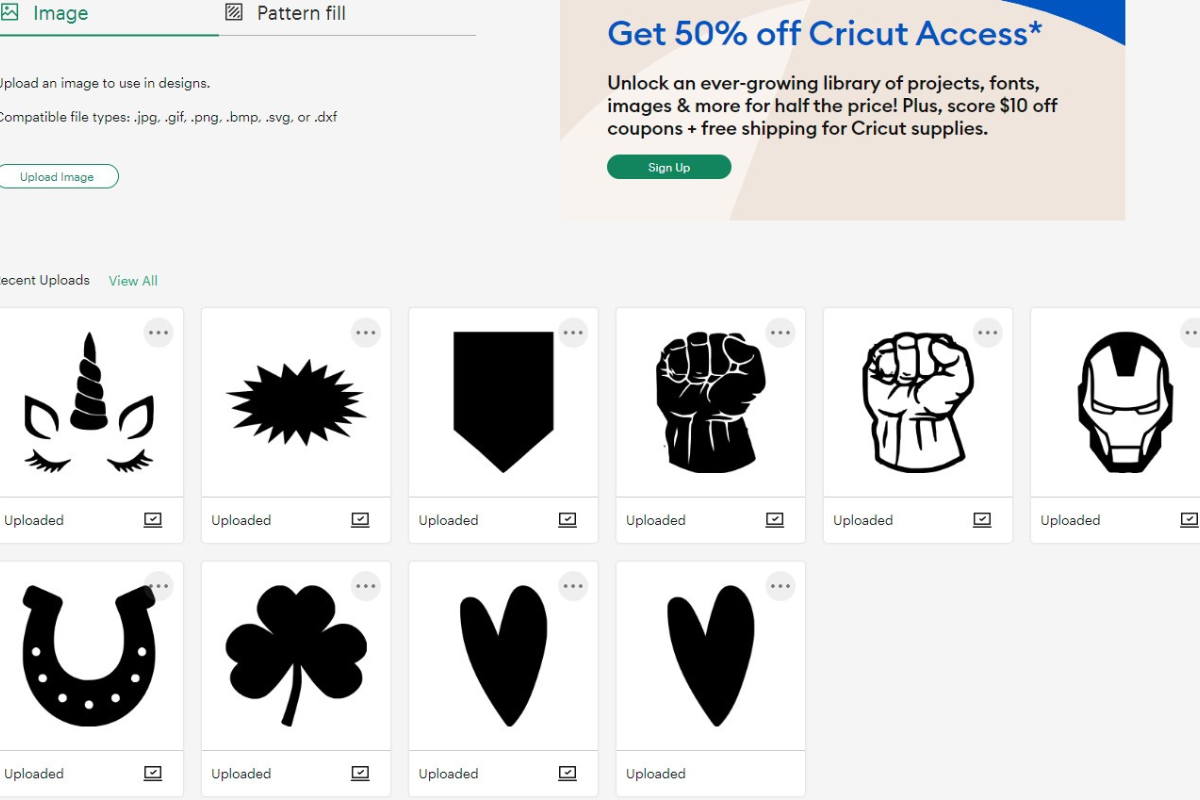
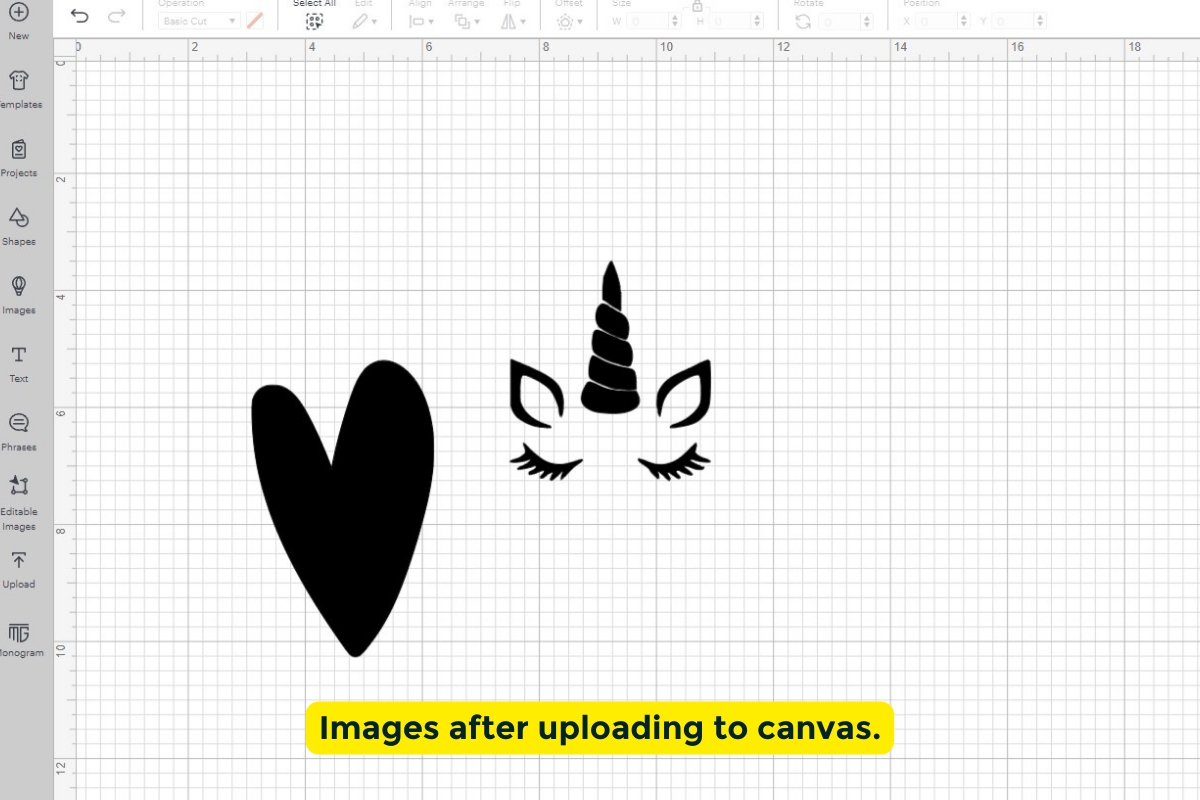
Upload
Did you know that Design Space lets you upload your own images to work on? It’s one of the incredible features of this tool: any image you have loaded on your computer or tablet can be uploaded into Design Space and edited. See my more detailed article on uploading your own images into Design Space here.
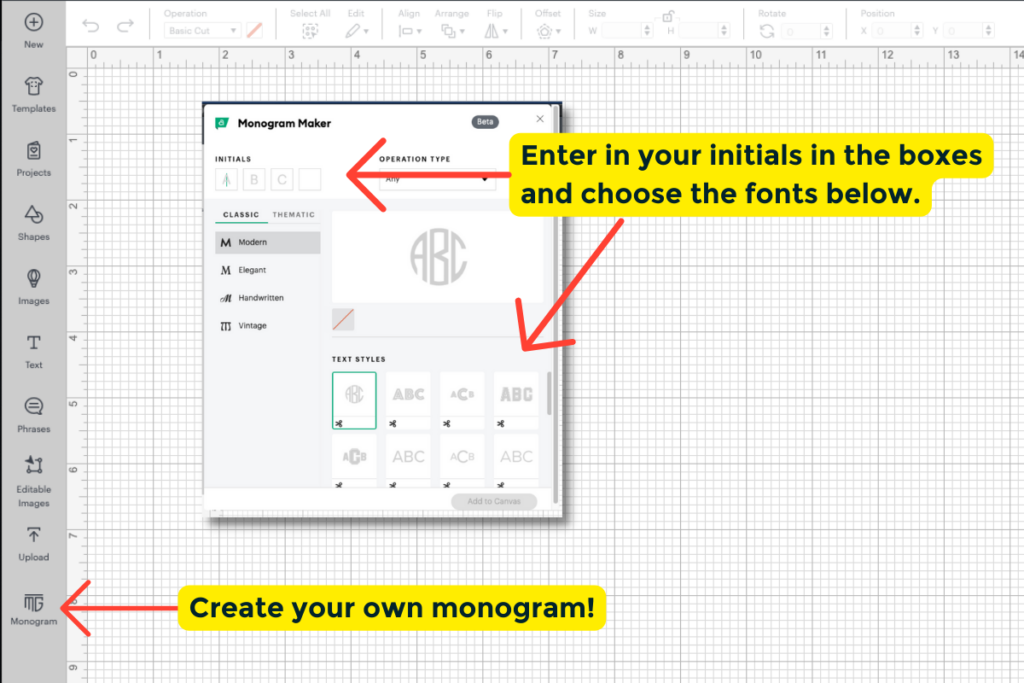
Monogram
This is such a cool feature. Back in the day you had to find your own monogram font and really make one from scratch.
Navigating the Layers Pane in Cricut Design Space
In the Layers Menu, you’ll also be able to see every piece of your design that exists on your canvas. Each shape, each image, each text box is it’s own “layer.” Here is where you can select and edit each “layer” individually.
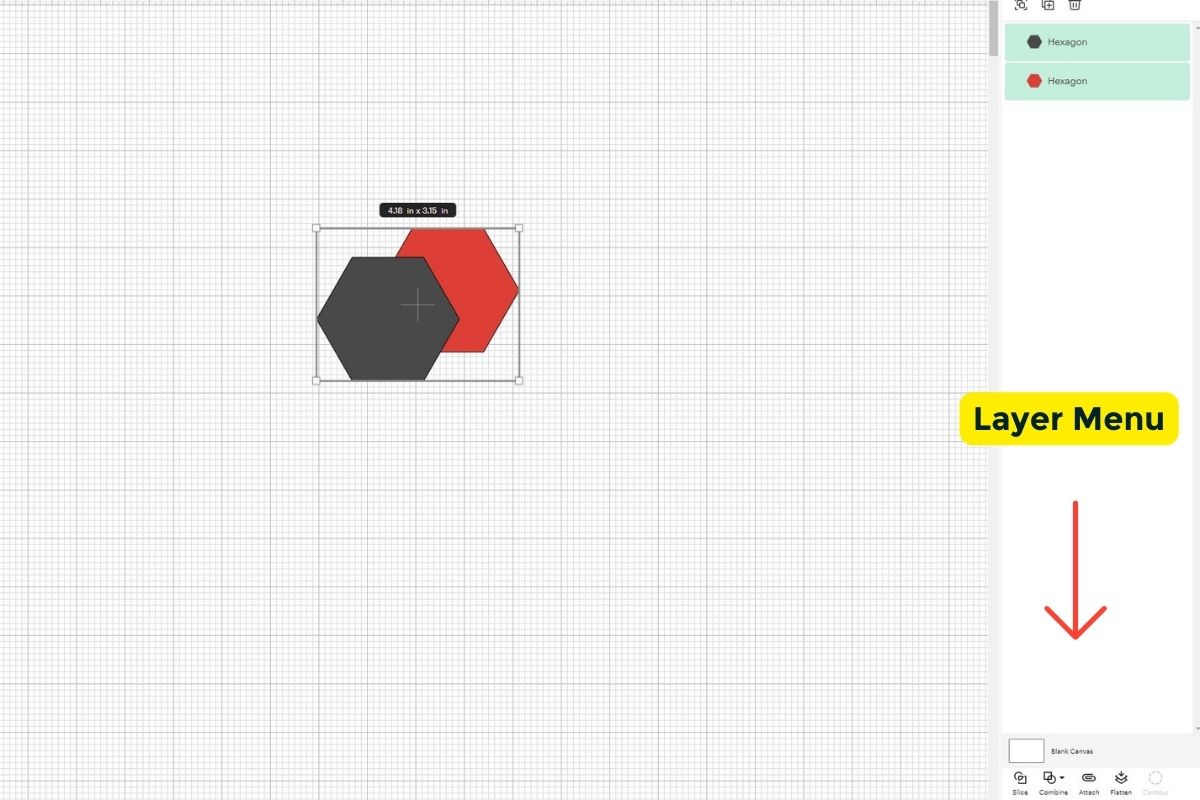
Layers Menu
The Layers menu gives you a number of incredible editing options when creating your designs. Find it open at the bottom right-hand side of your screen: here you’ll see a few different options including Slice, Combine, Attach, Flatten, and Contour.

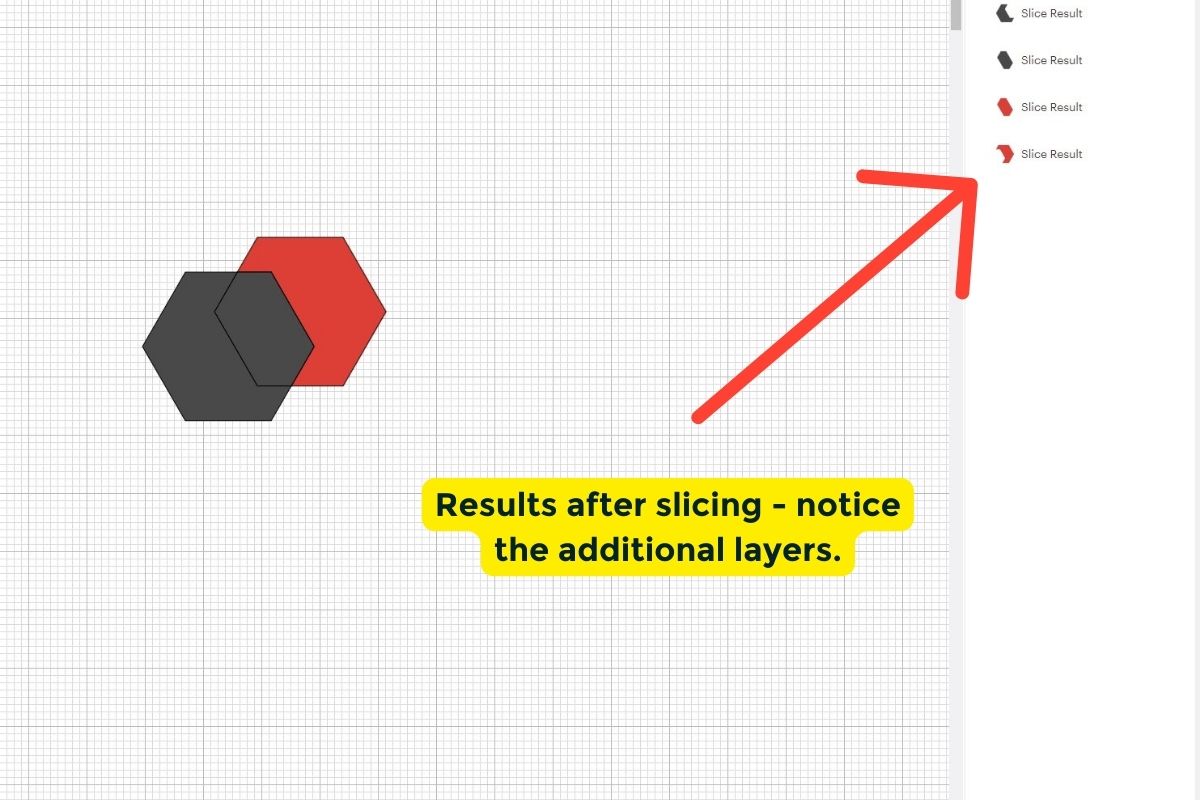
Slice
Cut two overlapping layers into individual parts. See the example below: it’s important when you slice that you’ve got exactly the overlapping layers that you want “sliced” clicked on. In order to slice a design, you always have to have two designs selected.
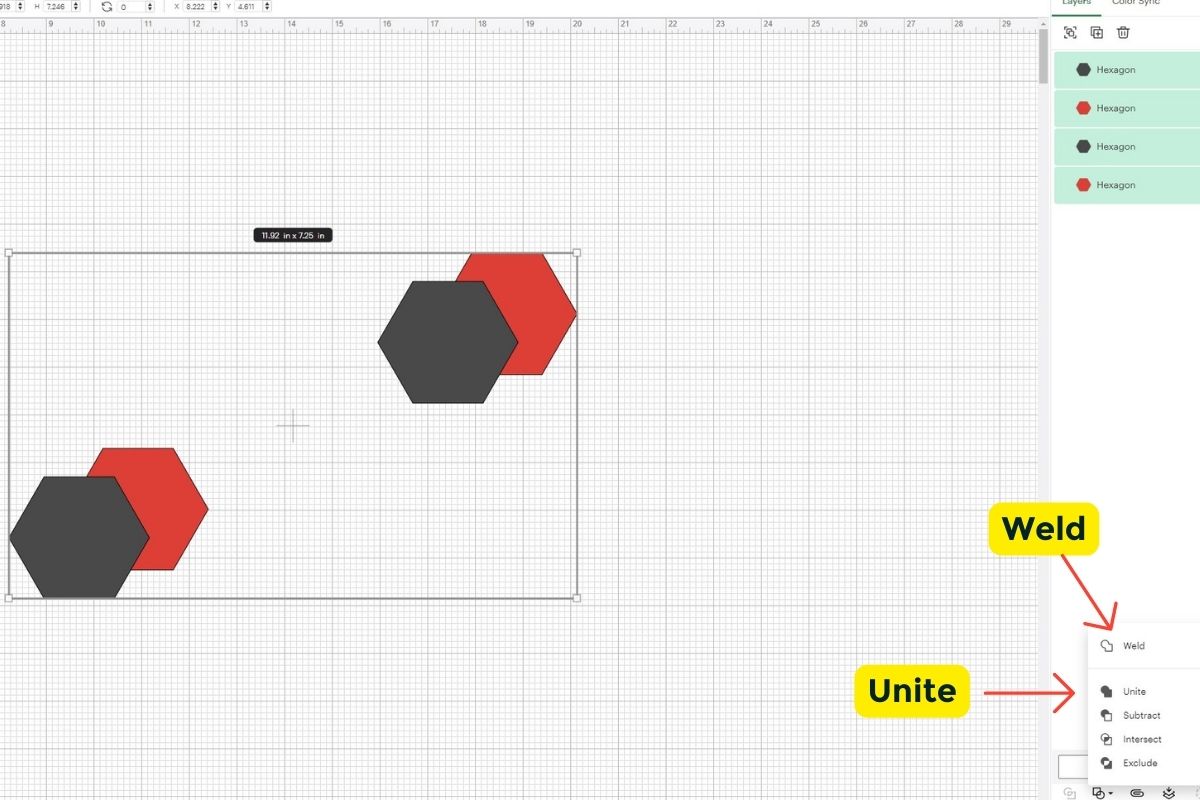
Combine
The Combine tool provides five actions – Weld, Unite, Subtract, Intersect, and Exclude. These allow you to combine objects to make new shapes.
Weld
Create one single, cohesive image from two distinct layers. In fact, weld is sort of the exact opposite of slice (see image below). You will also want to use this when using cursive or script fonts before cutting. If you don’t the words will not be attached and will have cuts where the letters overlap. Welding is permanent. You can undo a weld if it has recently been created, however once you save or close Design Space, you cannot un-weld your images.
Unite
Unite is very similar to Weld with one big difference. You are still able to access the individual pieces, you can manipulate it. Move it, make it bigger, rotate it, delete it, ect. Notice how the hexagons look the same but the unite result still has two layers in the layers panel.
Subtract
This tool is similar to the Slice tool. The only difference is that Subtract does not leave you with any additional pieces leftover. It just cuts the top layer out of the bottom layer.
Intersect
This tool takes two overlapping layers and leave you with only the section that overlaps. In the example below the only part left of the two hexagons is the intersecting middle piece.
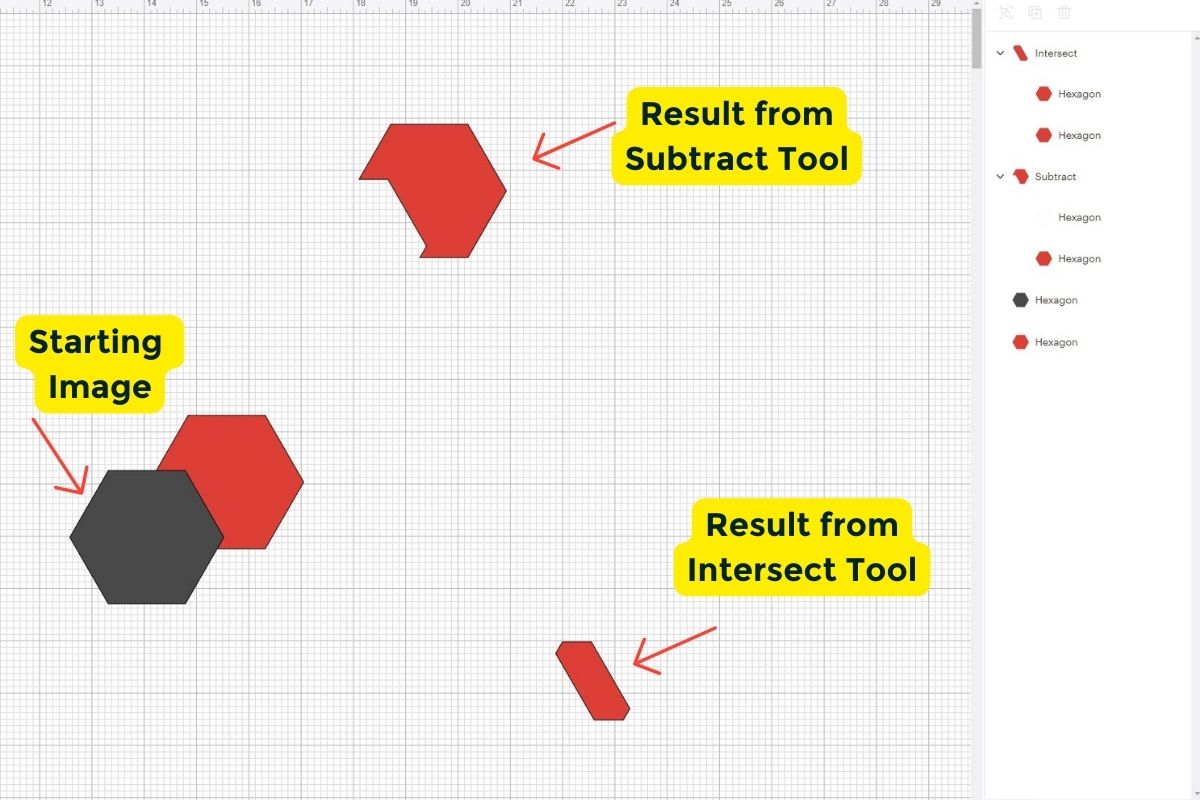
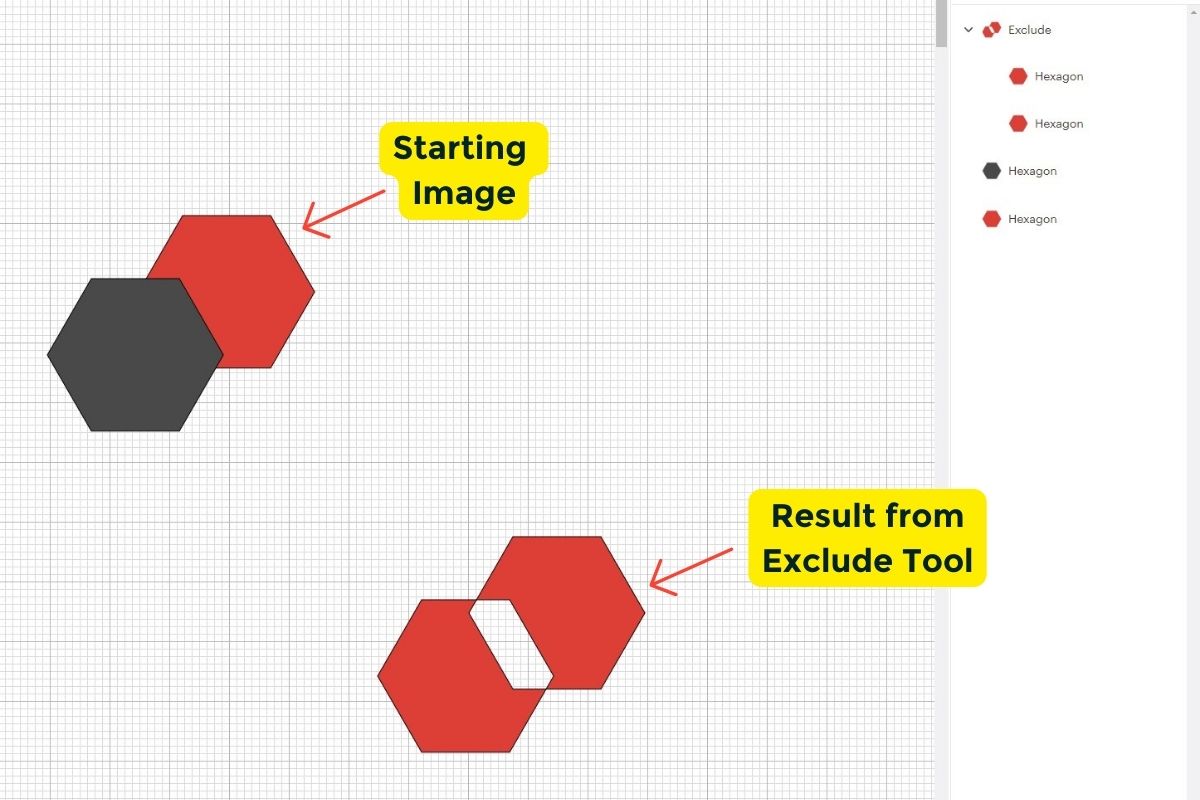
Exclude
The Exclude tool is the opposite of the Intersect tool. Everything that is overlapping is cut out and everything else remains.
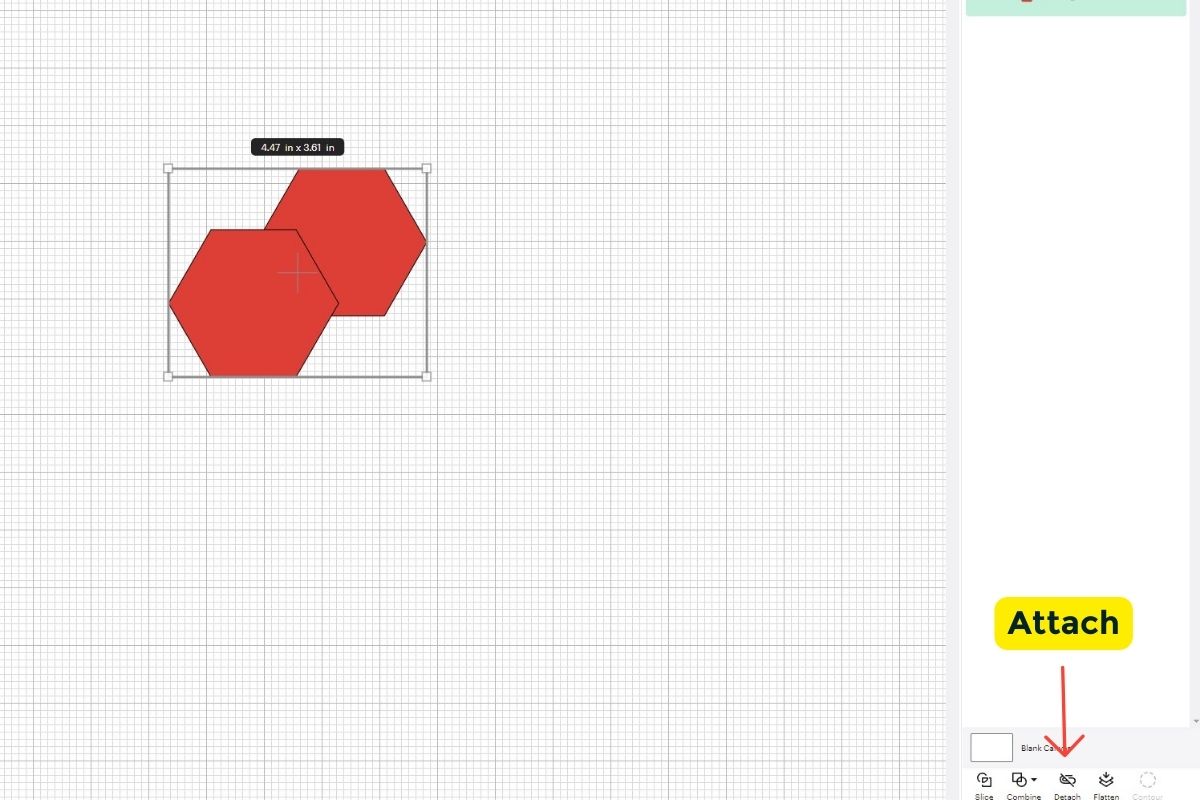
Attach
Keeps your image in place for cutting or for adding text.
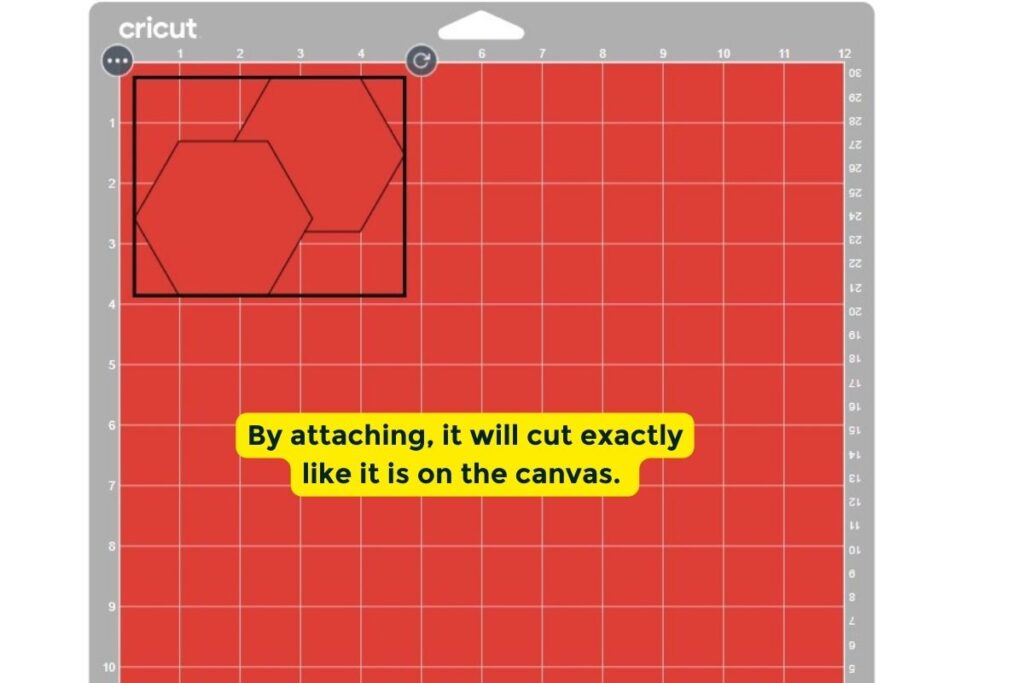
Some things to know about Attach: if you want your Cricut to cut an image EXACTLY as it appears on your canvas, use attach. Otherwise, the Cricut will move the image around to conserve materials, which is great from a reduce, re-use, recycle perspective, but not so great if you wanted that cute heart to be EXACTLY where you placed it. Notice after you attach your shapes the wording changes to Detach, which will undo your Attach.
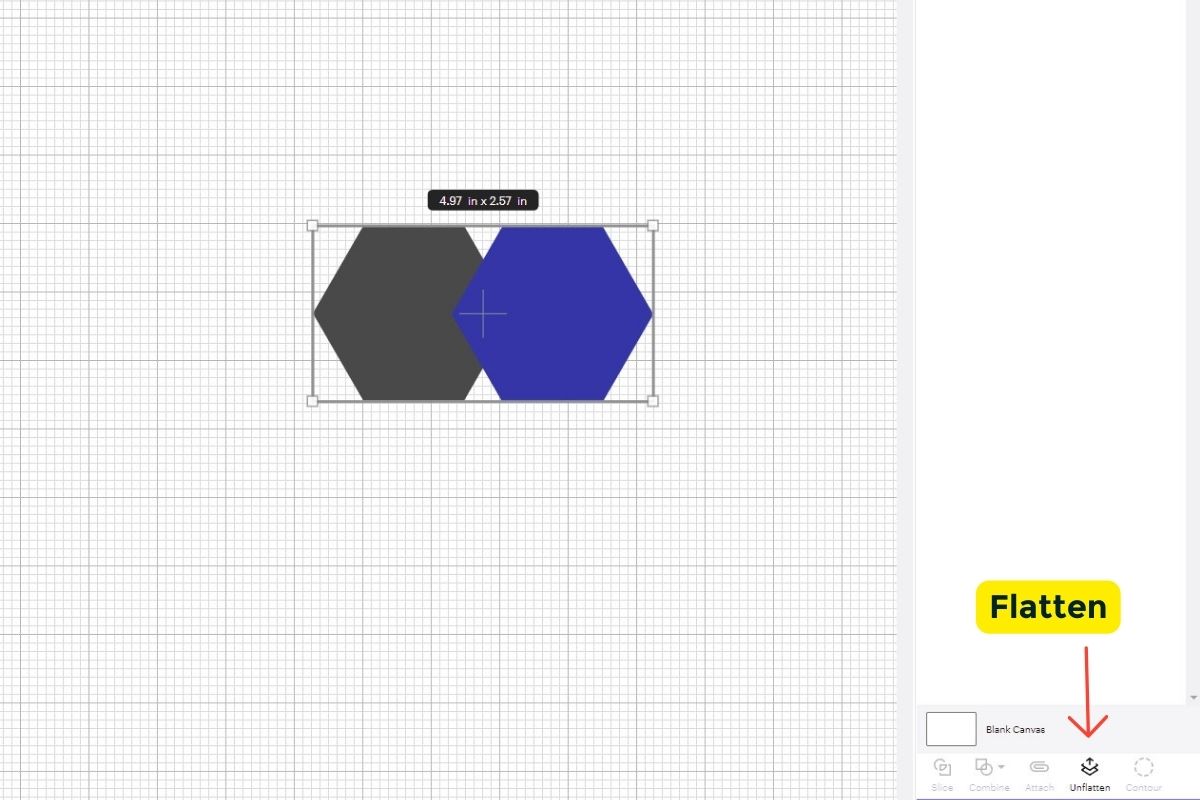
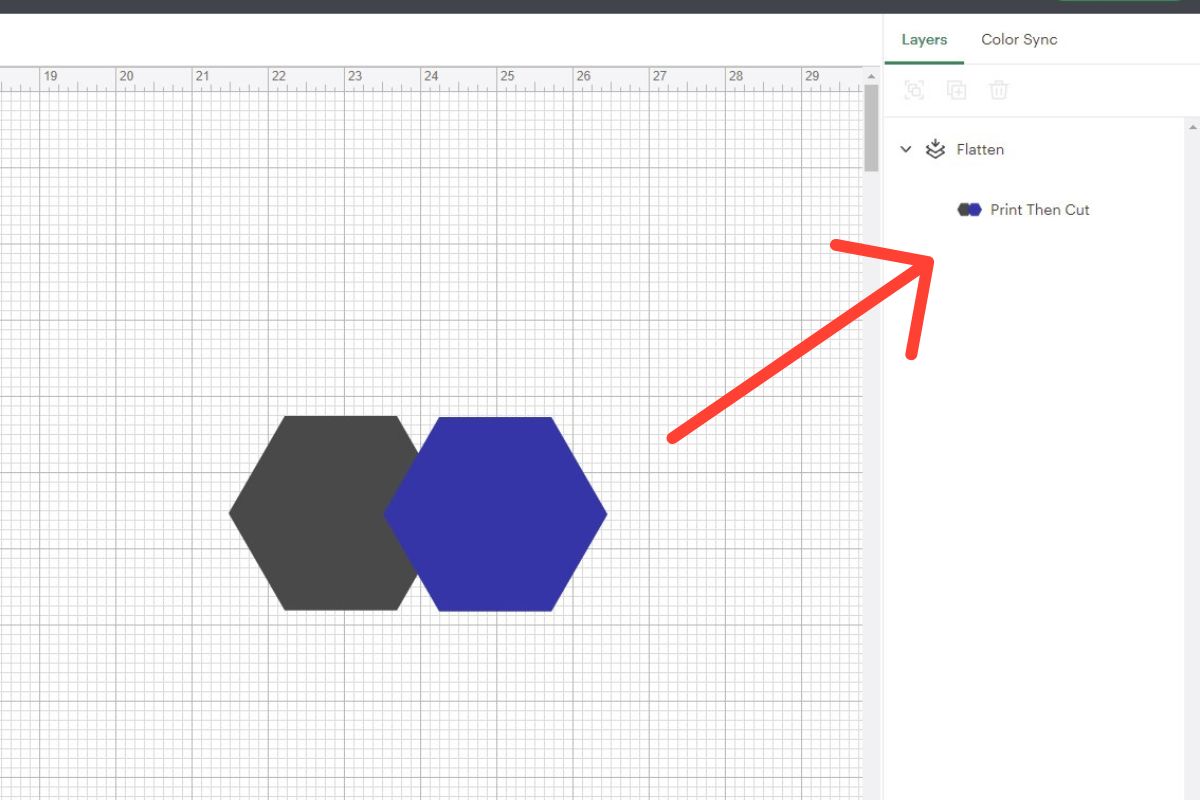
Flatten
Merges two layers together to allow for a single printable image. This is primarily used when you are working with a print and cut project. Notice again after you flatten the image the word changes to Unflatten which will allows you to undo your flattening of your images.
Contour
Hides or unhides grid lines on an image.
Cutting, Scoring, and Printing in Design Space
You can also cut, write, score or print your layers here. These are the options available to you when you actually go to use your design with your Cricut machine. The scissors icon with the circle next to it means you are ready to cut; there’s also a writing icon that’s a little pen, a printing icon, etc.
Score
The scoring function uses the scoring tool that comes in the Cricut Toolset. Basically, your Cricut applies pressure to the tool to make an invisible folding line. This comes in handy when making cards, boxes, and envelopes!
You will only use the Print button when you are making a print and cut design. This is applied when making stickers or other designs that just look better printed versus cutting vinyl or cardstock. I have seen many people do this when they need a specific character or graphic for stickers. In order to use this function, you will need to have a printer connected to your computer.
Writing
Wanting to make handwritten cards? This is where the Cricut pens come in handy. You will place a pen into the other port next to the blade on your Cricut machine. After you finish your design, just be sure to choose a writing font. These are single-line fonts that are specifically designed to be used with the pens.
Cut
90% of the time, people use their machine for cutting vinyl, cardstock, wood, etc. So most of the time, or at least in the beginning you will probably use the cut function.
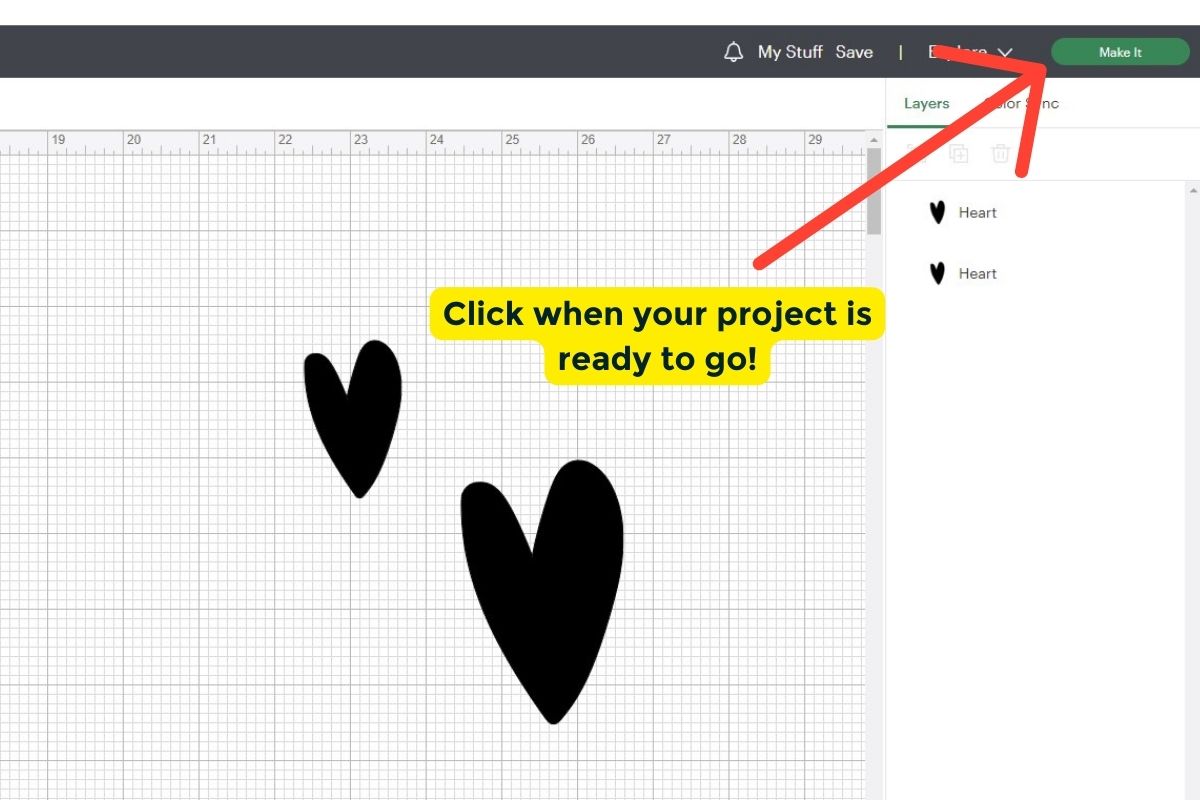
Ready to Make Some Magic!
The “Make It” button can be found in your top right-hand corner: this is the button you get to click when your design is gorgeous, glowing, and ready to go!
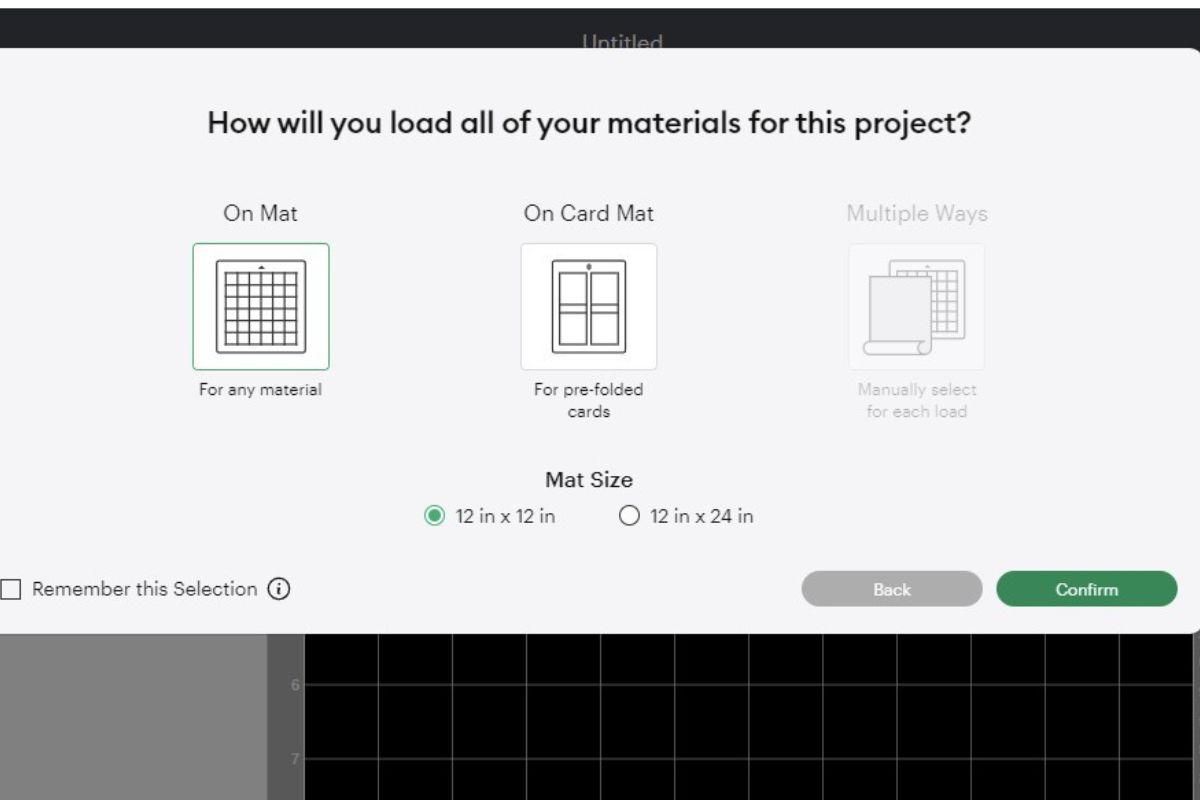
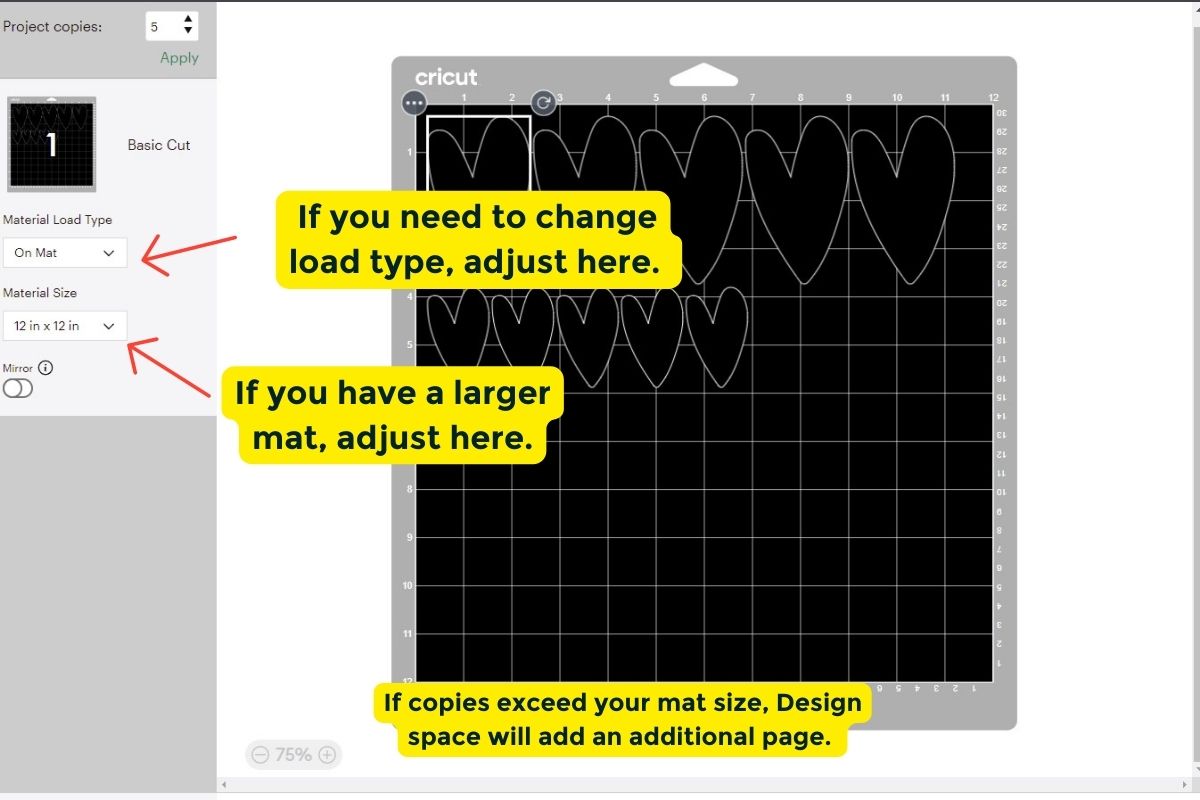
Clicking “Make It” opens up your mat. You are prompted with a screen that asks you how you will load the material for your project. Choose the correct option for your project and the mat size you will be using.
Click on your image in the mat: a lot of editing options still remain here. When clicked, dots will surround your image indicating that you can move the image, rotate it, or even push your image onto another mat. In the top left-hand corner of your screen, you will see “Project Copies”: if you want multiple copies of your cut or print, you’ll adjust that number here.
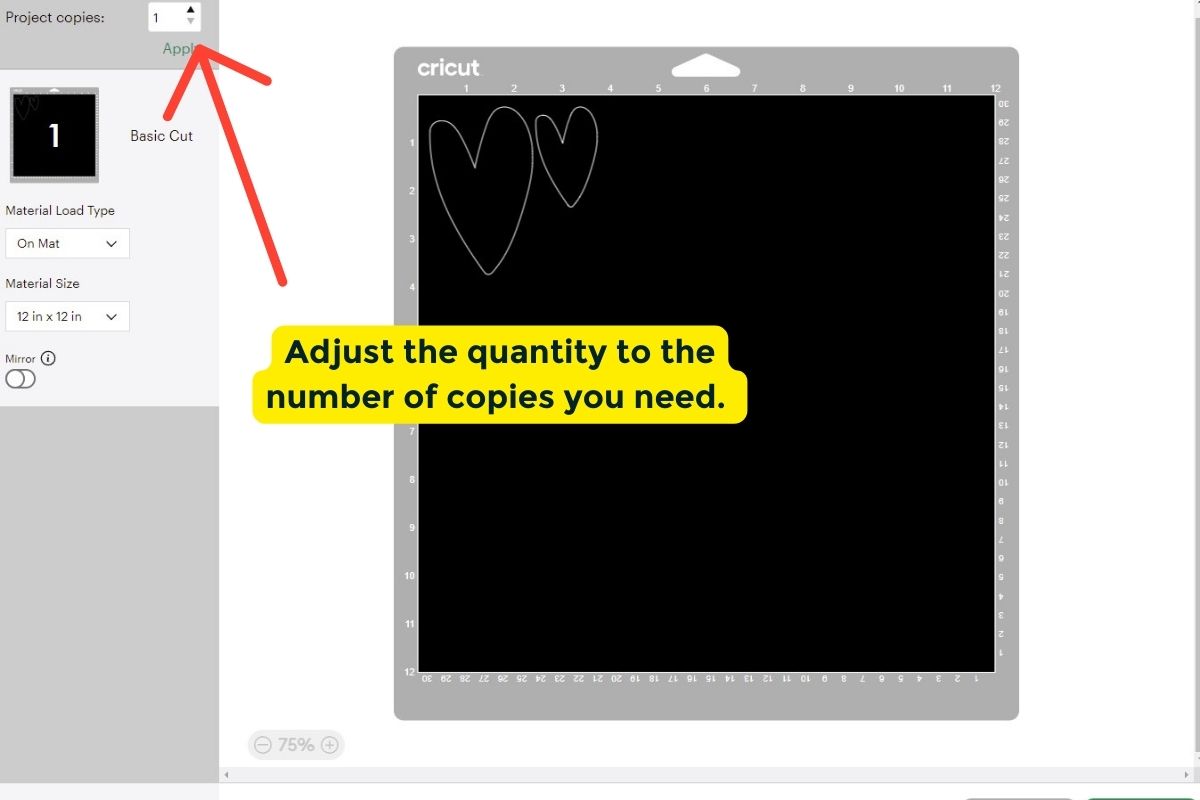
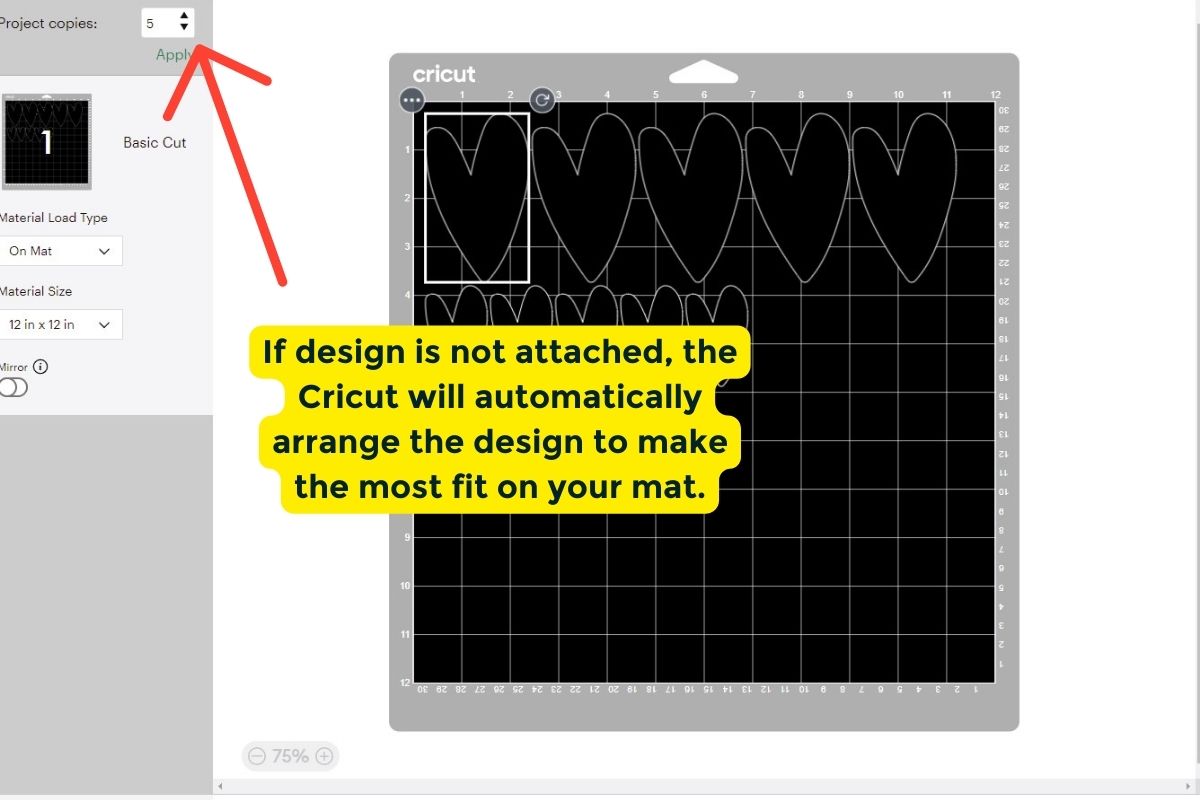
Let’s say that I want 8 copies. I’ll put an 8 in the box, and then voila! My 8 images will appear. Depending on the size of your images, this may take you onto multiple mats, which is A-Okay. You still have the freedom at this point to move images from mat to mat, rotate them or remove them as needed.
Note: Design Space defaults to a mat size of 12X12, and rightly so: most of your Cricut printing and cutting materials will occur in a 12X12 sheet. BUT, if you would like to alter that default mat size, you can do so here. You can also change the Material Load Type here.
Finally, click “Continue” to cut or print your images. And enjoy!
Pat yourself on the back! You’ve just learned how to use Cricut Design Space! Soon you’ll be crafting and re-arranging your own unique designs at an unstoppable pace.